
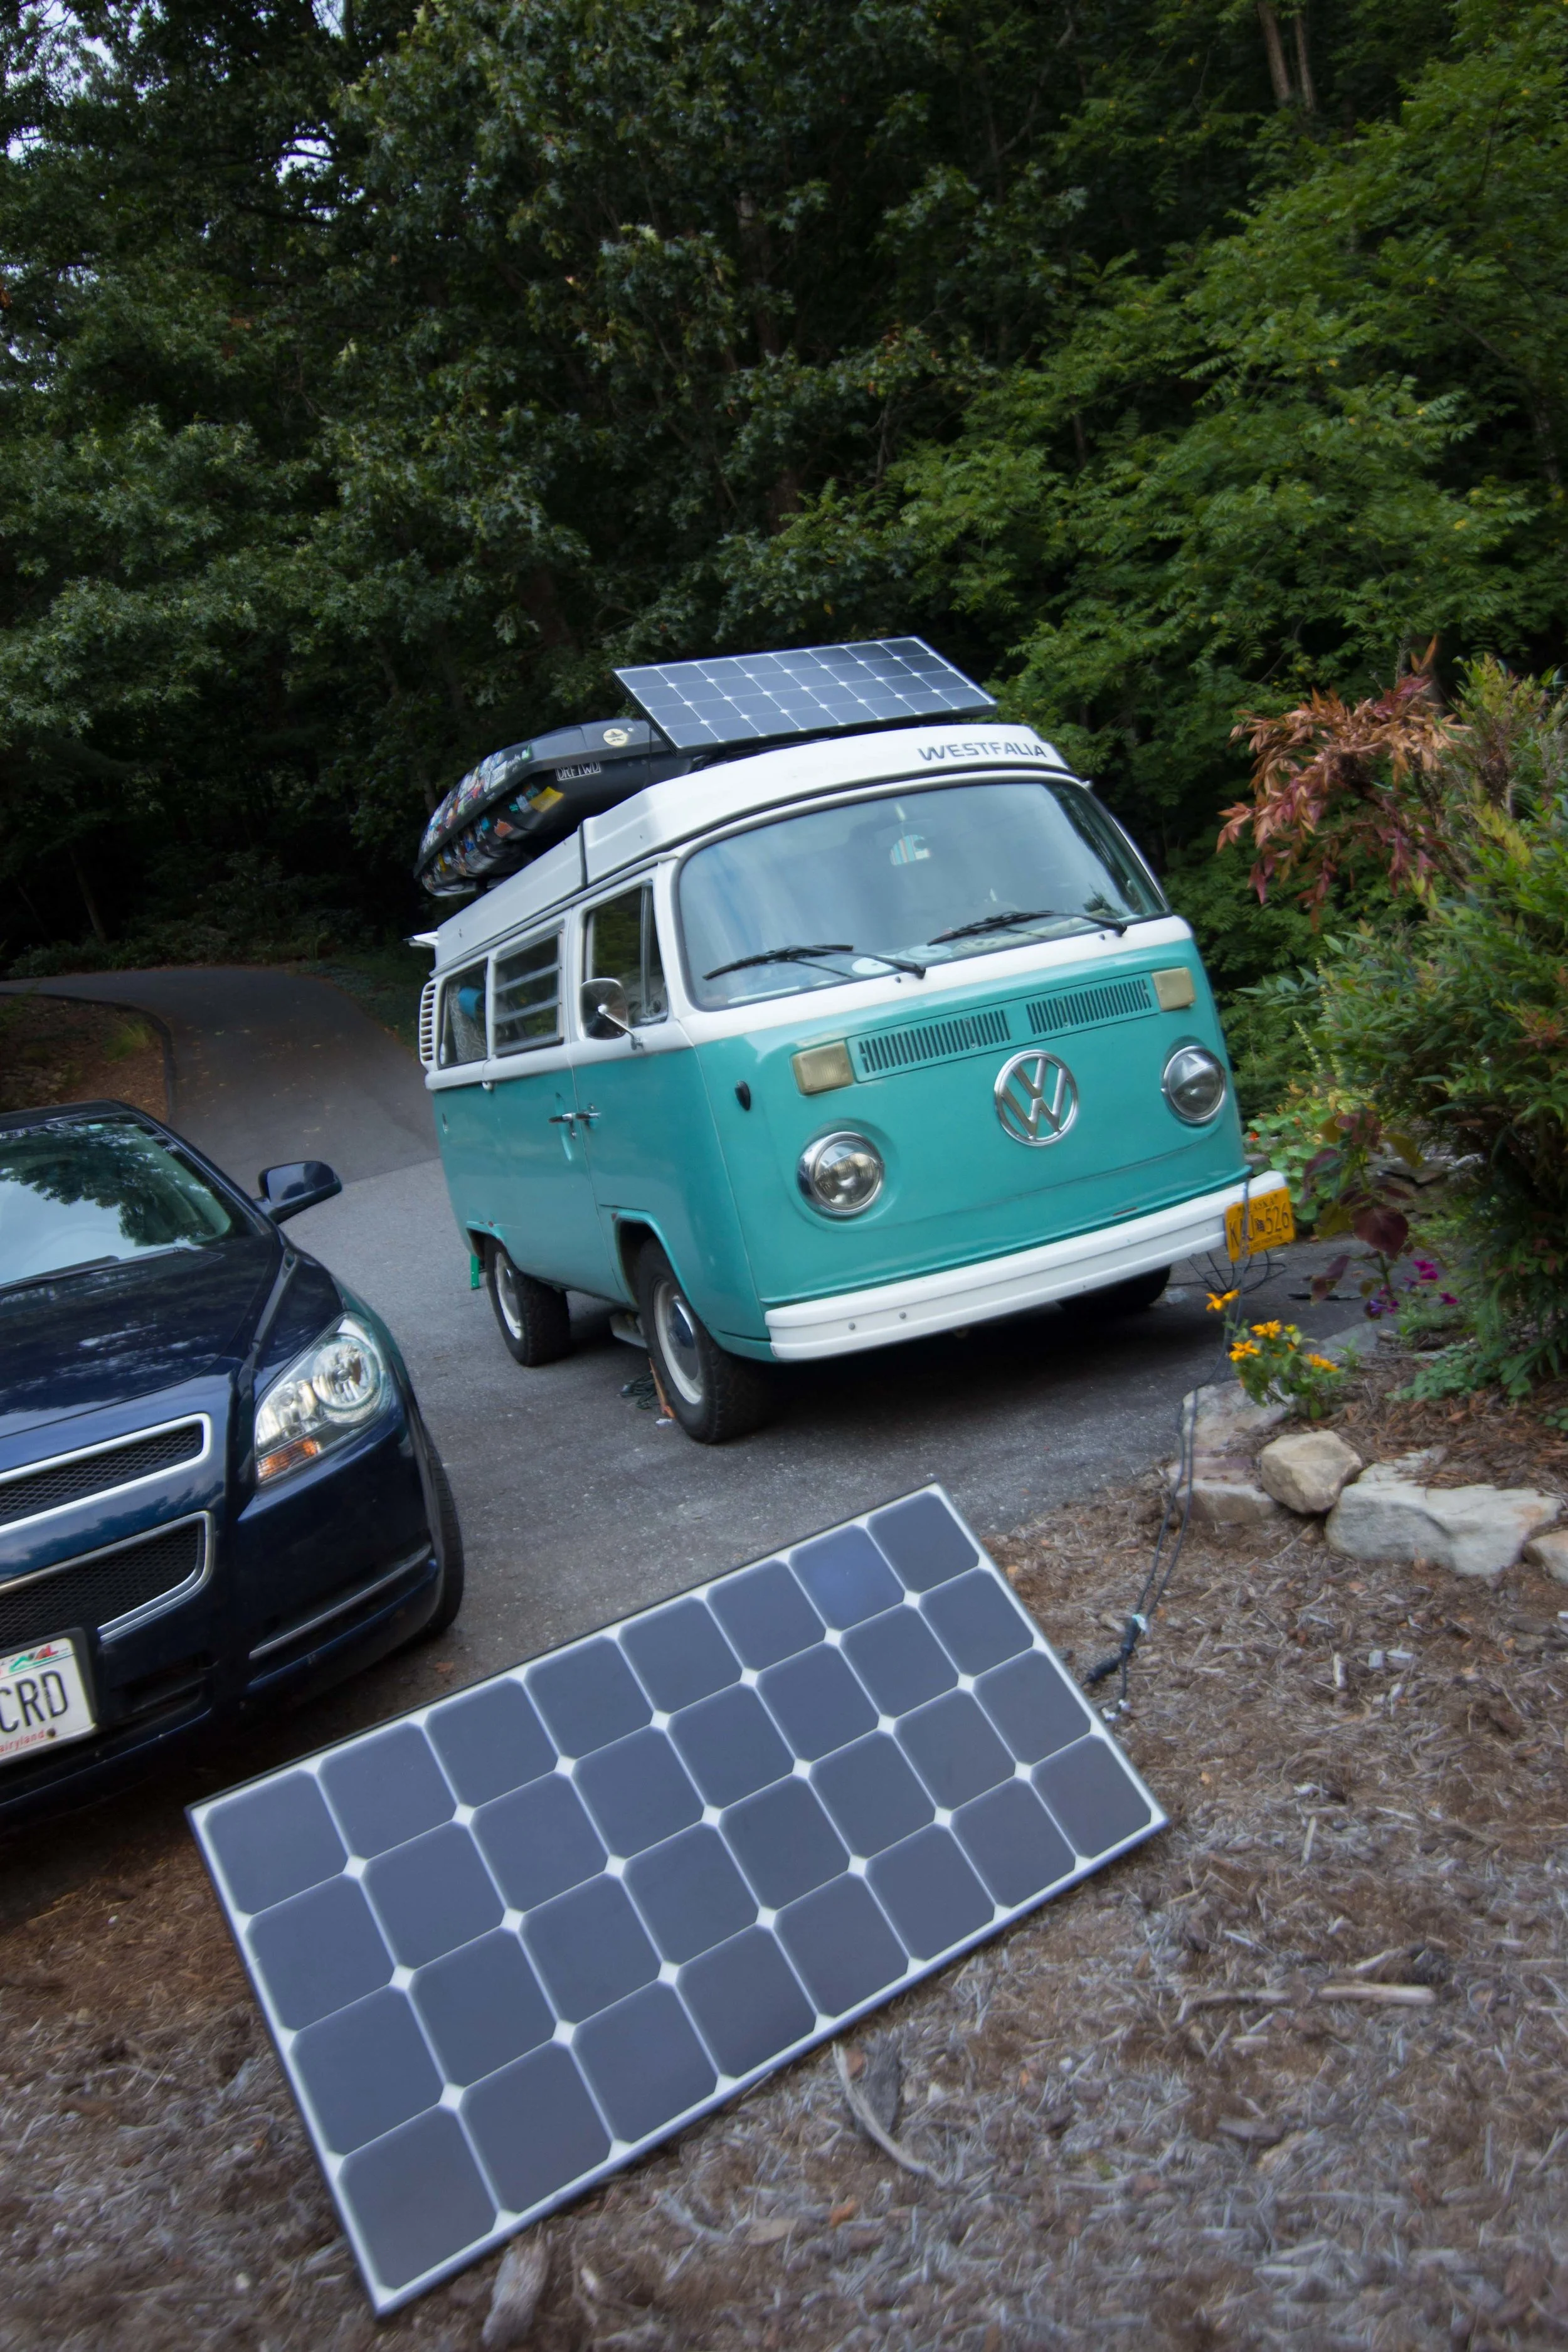
We worked with our friends at Renogy Solar to come up with the perfect 200 Watt solar solution for Westfalias. We have two 100 watt panels, both store inside of our luggage rack. One is on a hinge so you can lift it to get a better angle on late day sun. The other sits under the hinged panel and is on a 30 Ft extension so you can place it in the sun when you are parked in the shade.
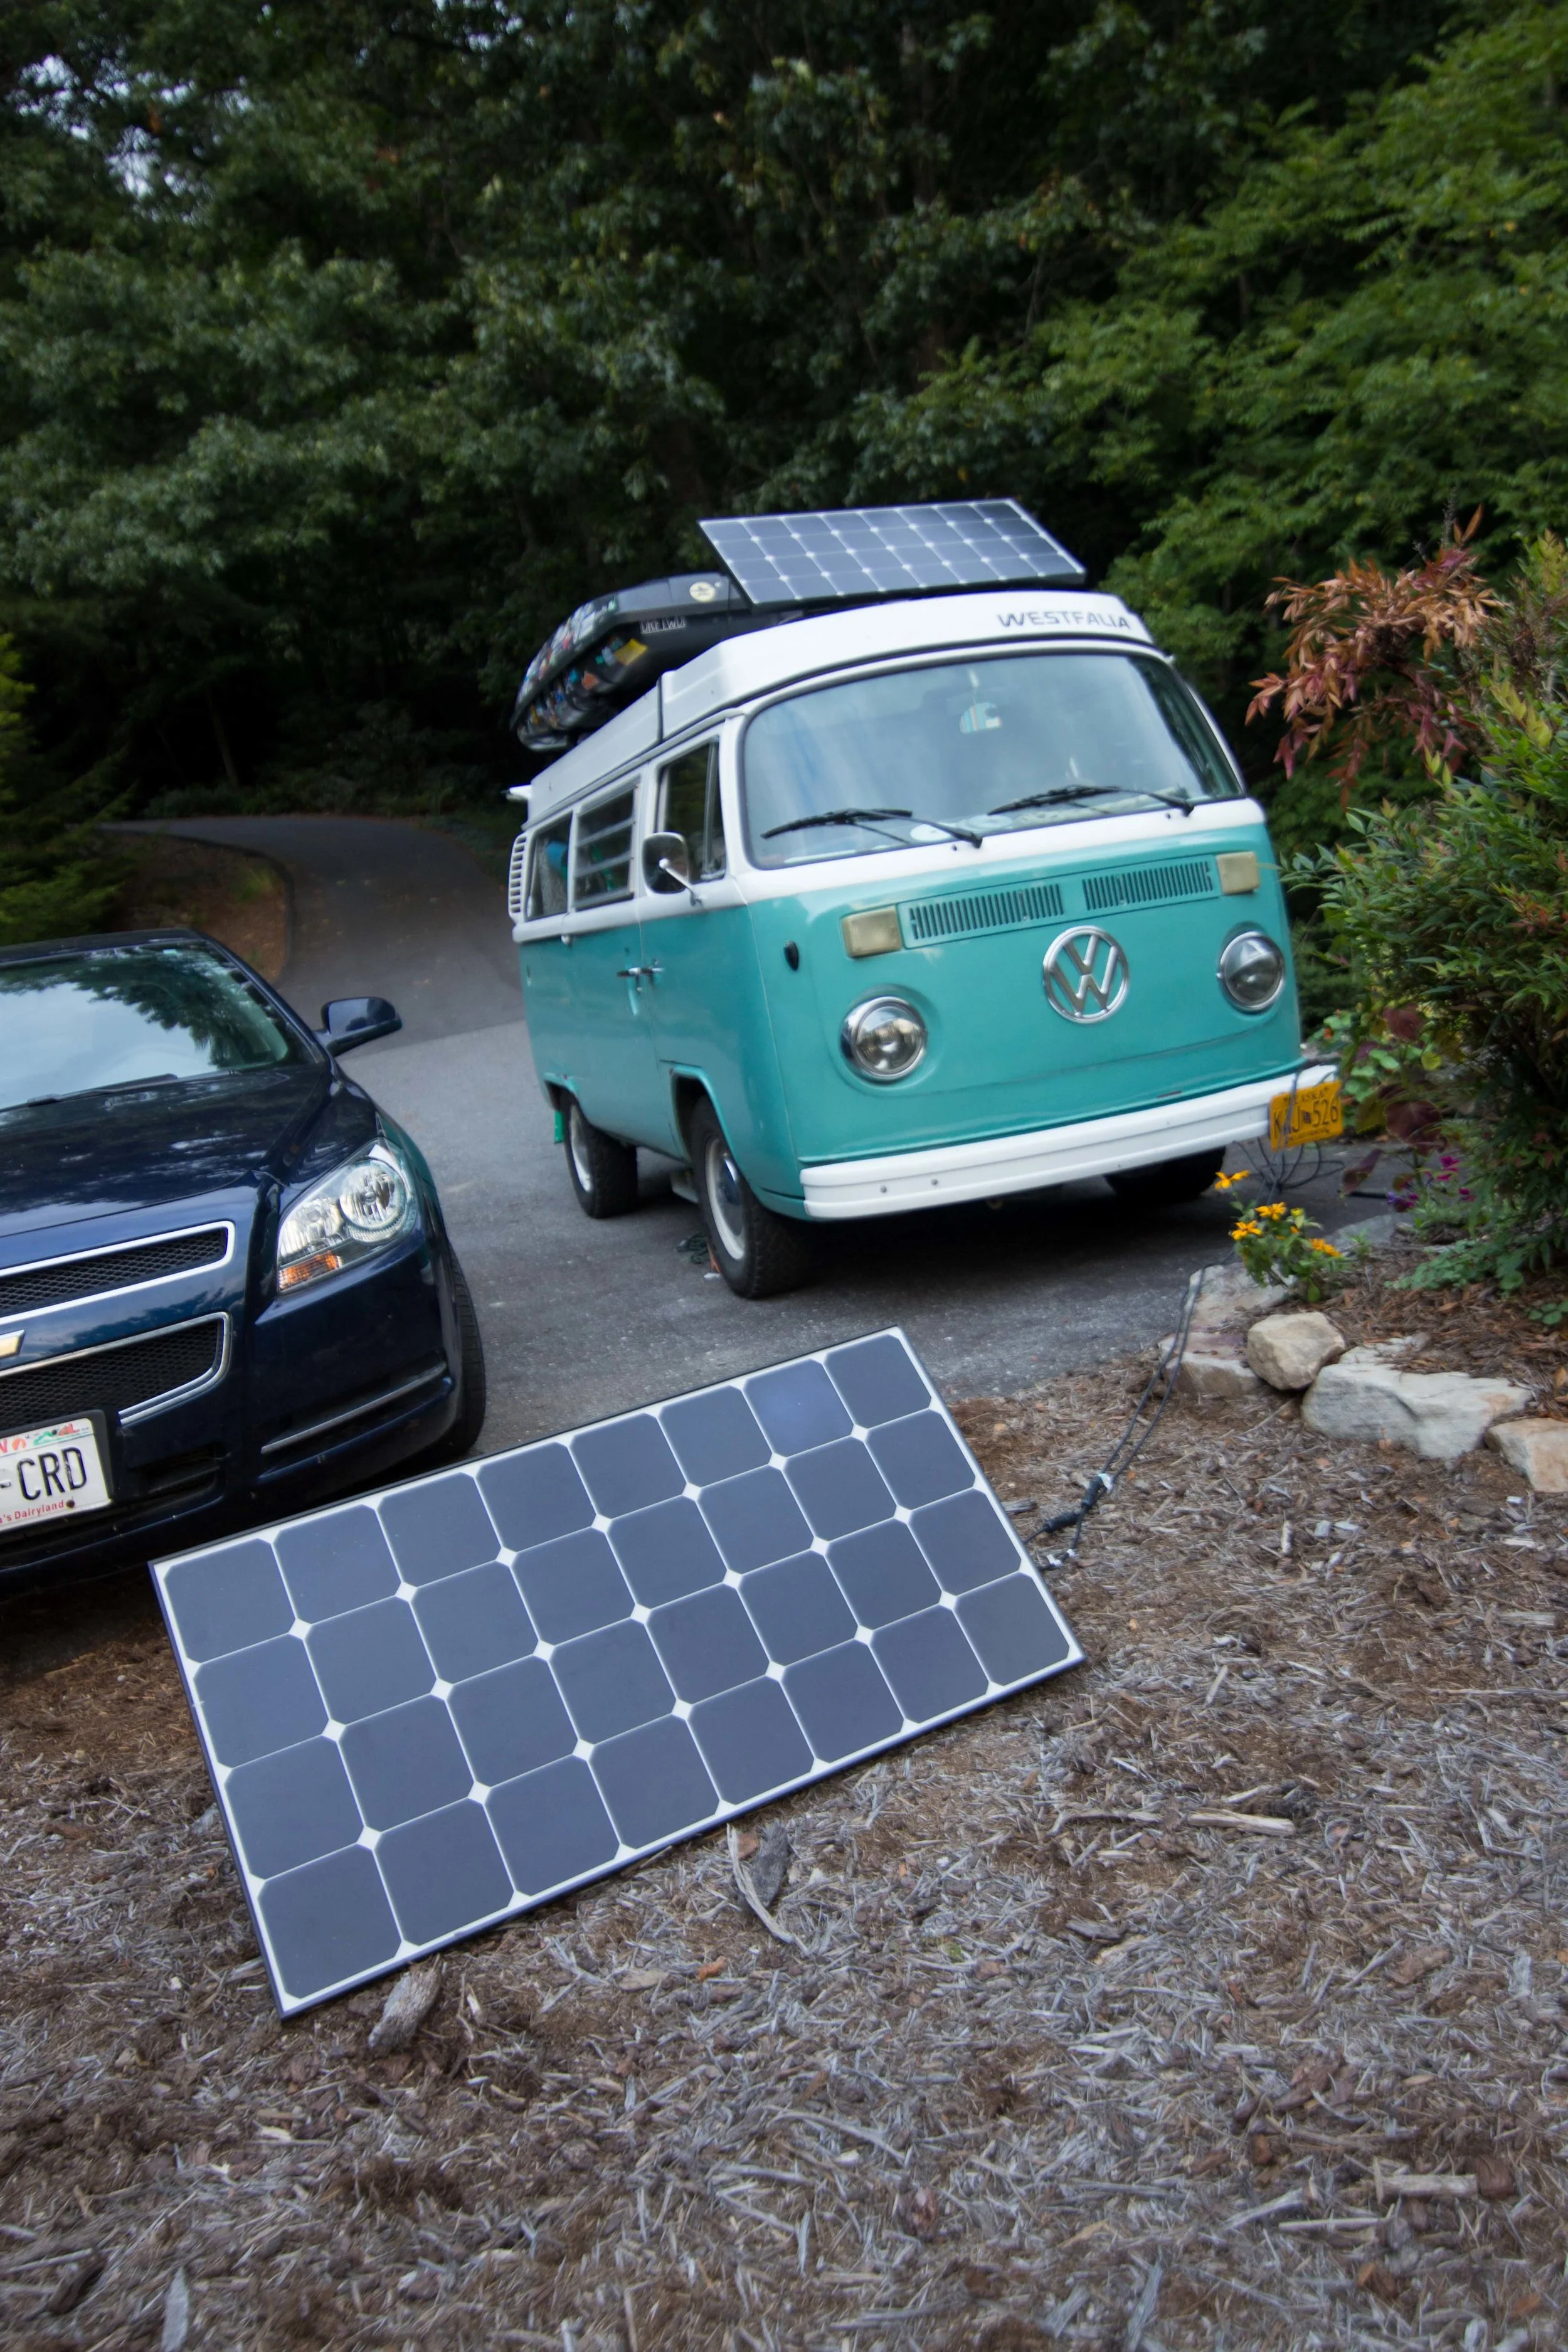
200 Watts to feed all of your energy needs.
What you need from Renogy if you would like to have the same kit as ours, with the same mounting locations in your bus.
2 X 100 W Eclipse Panels
1X Mounting kit (but 2X hardware if possible)
One Charge Controller
2 X Wiring "adapter" kits - 1x 9 FT, 1x 30 FT with MC4 connectors on Both ends
1 X Tray wiring kit, 16 FT
1x MC4 Branch Connector
*Note* If installing in a Vanagon or if you are using a different battery / charge controller mounting location you may need to modify your wire length, in particular you may only want the 8FT tray wiring kit, and you may want a 20ft or 40 FT extension for your moveable panel*
What you need from your local hardware store, or order them from Amazon and never leave the house!
3x 4" Door Hinges, You can buy them HERE on Amazon
2x Lid supports. Here's a two pack on Amazon
THE INSTALL
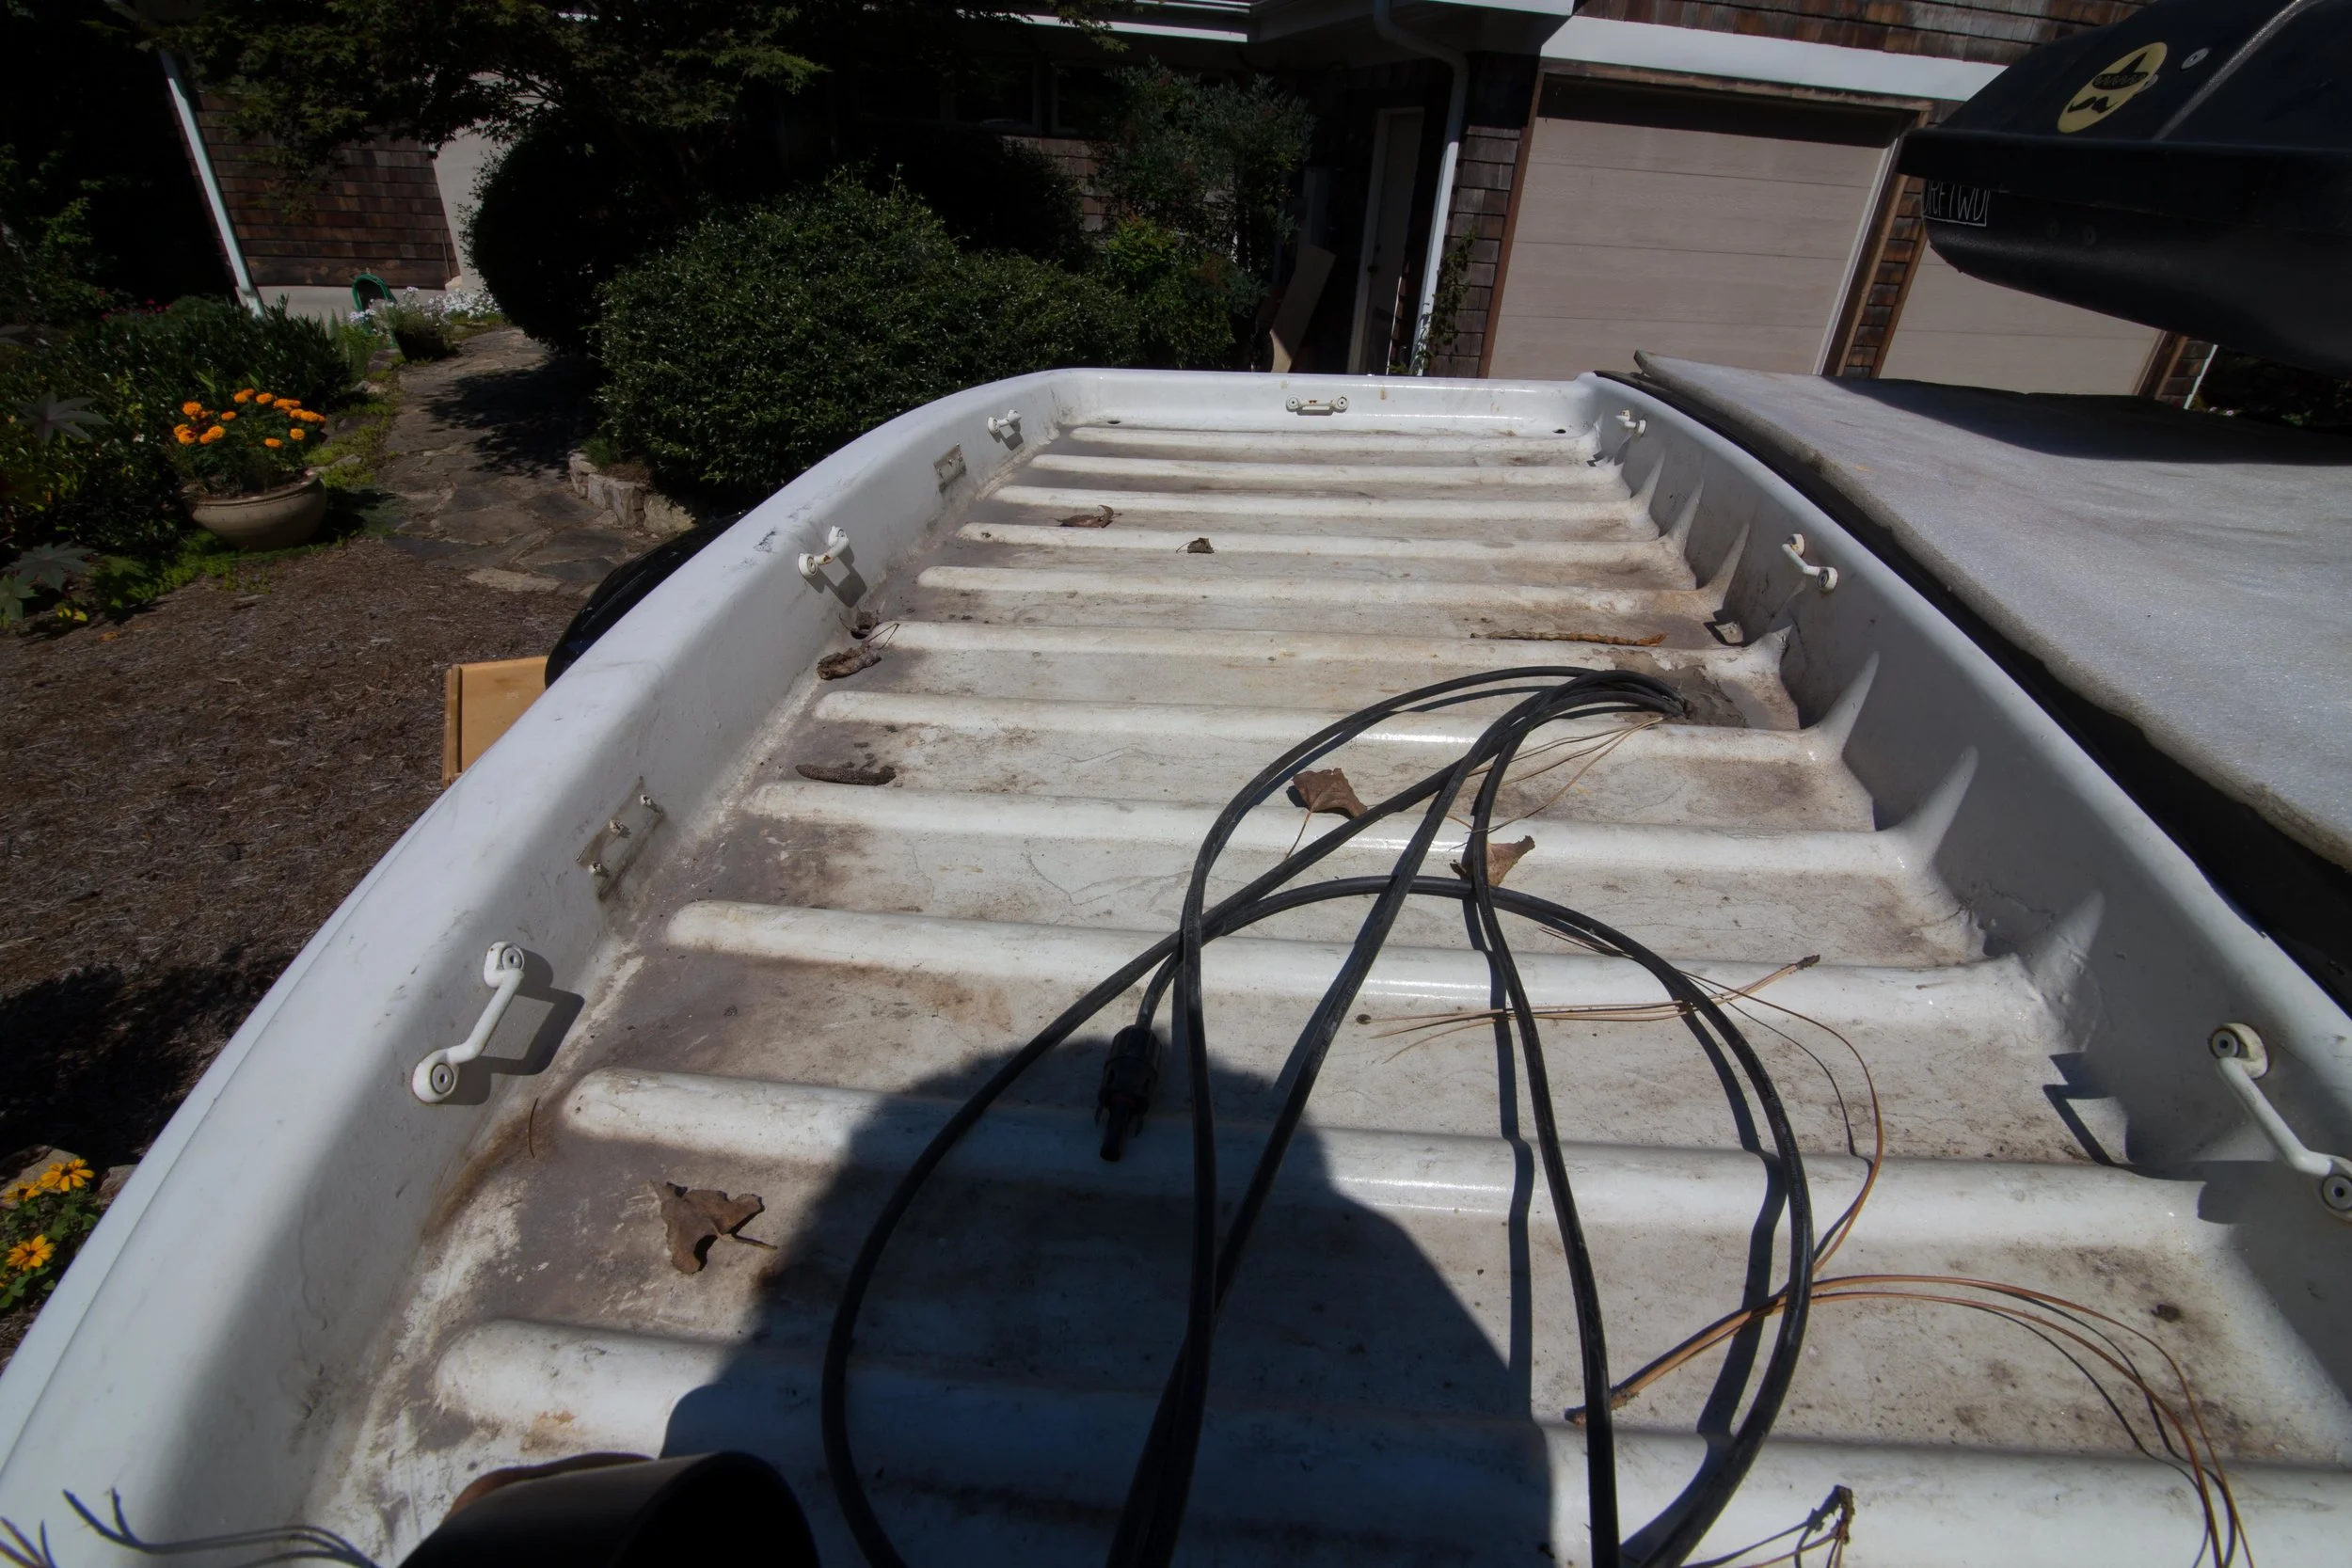
Wires through center of Luggage Rack
The wires are pulled from behind the headliner, secured near the driver's seat belt, then routed behind the bulkhead. I drilled a two holes in the bulkhead, one for the panel wires to the controller and one for the tray wires, from the controller to the battery in the engine bay.
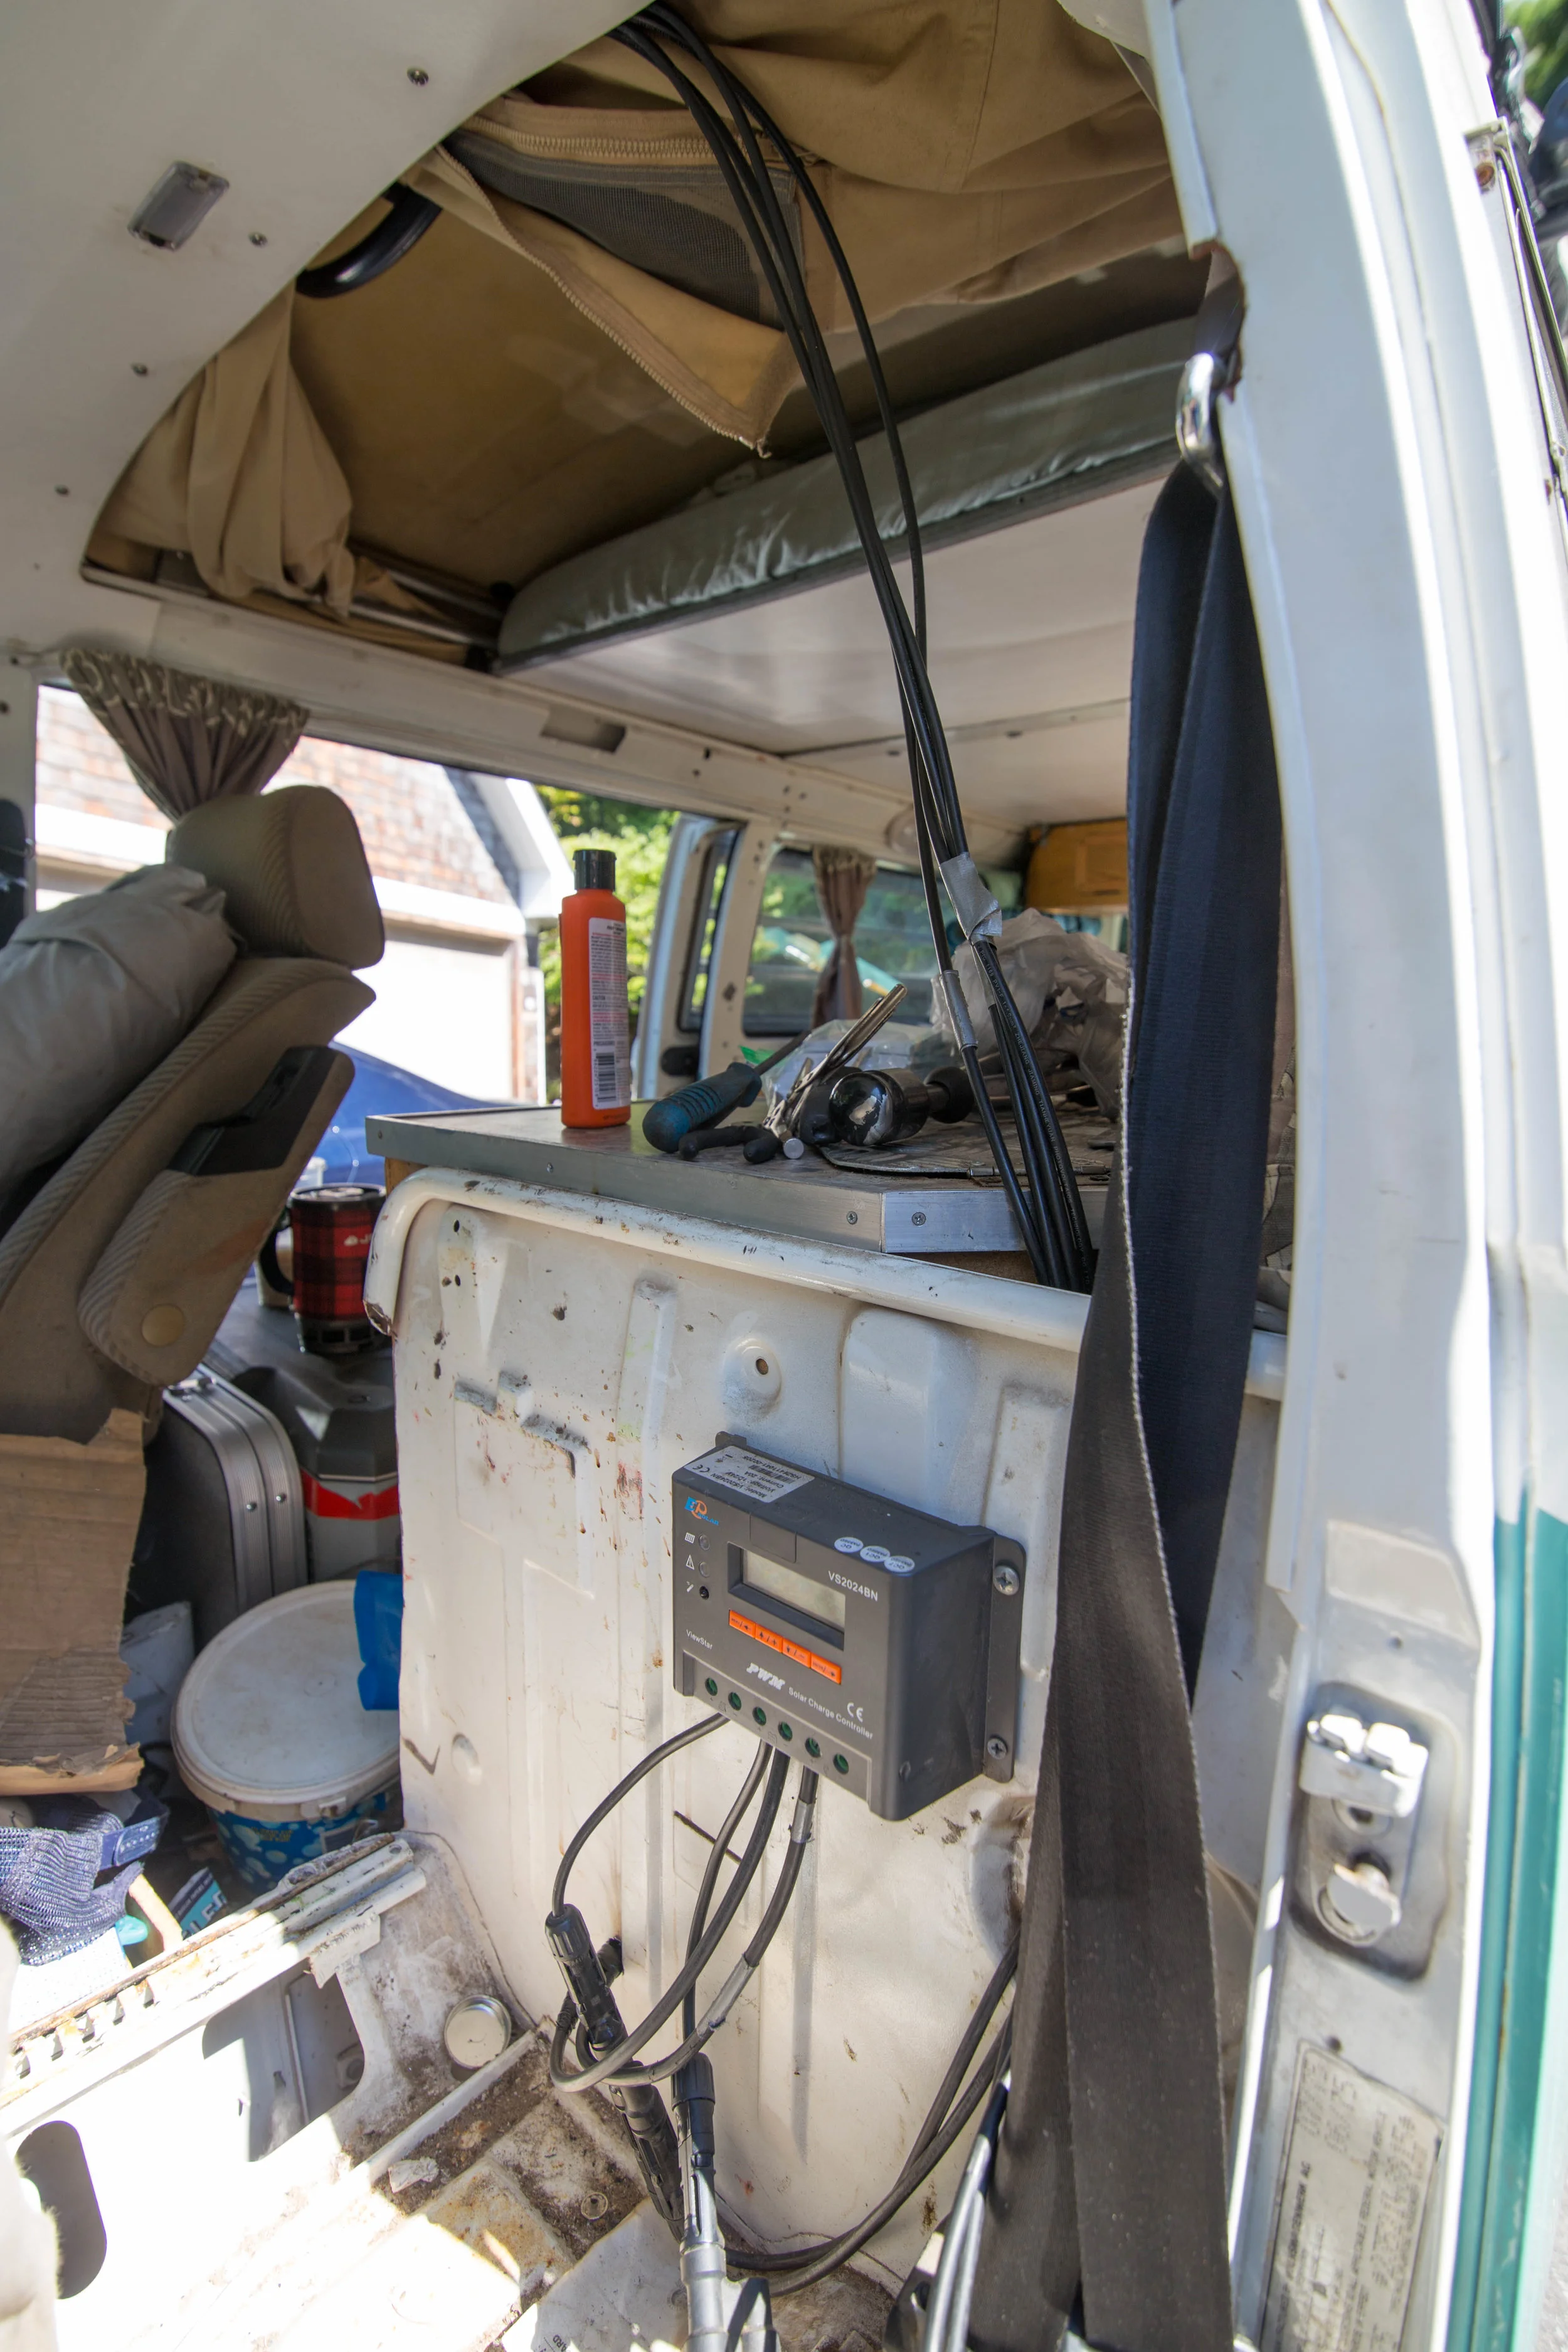
We had an older solar system already installed so our wiring was already in place. We drilled a hole in the top center of the luggage rack, and our roof. We then put some paint for protection around the hole in our roof. We funneled the panel wires through the hole, and towards the driver's side seat belt. We mounted the charge controller behind the drivers seat on the bulkhead. Everyone's set up is different, ours works for us and is well hidden once fully installed.
The tray wires are routed through a hole in the lower bulkhead and join some other wires for our main cabinet. From there they follow the other wires to the house battery in the engine bay. We used the 16FT tray cables and cut them down to 12ft or so. Make sure you fully lay out the cable before cutting. Also, make sure you follow the included renogy directions. Wire your battery before anything else ( especially connecting panels! )
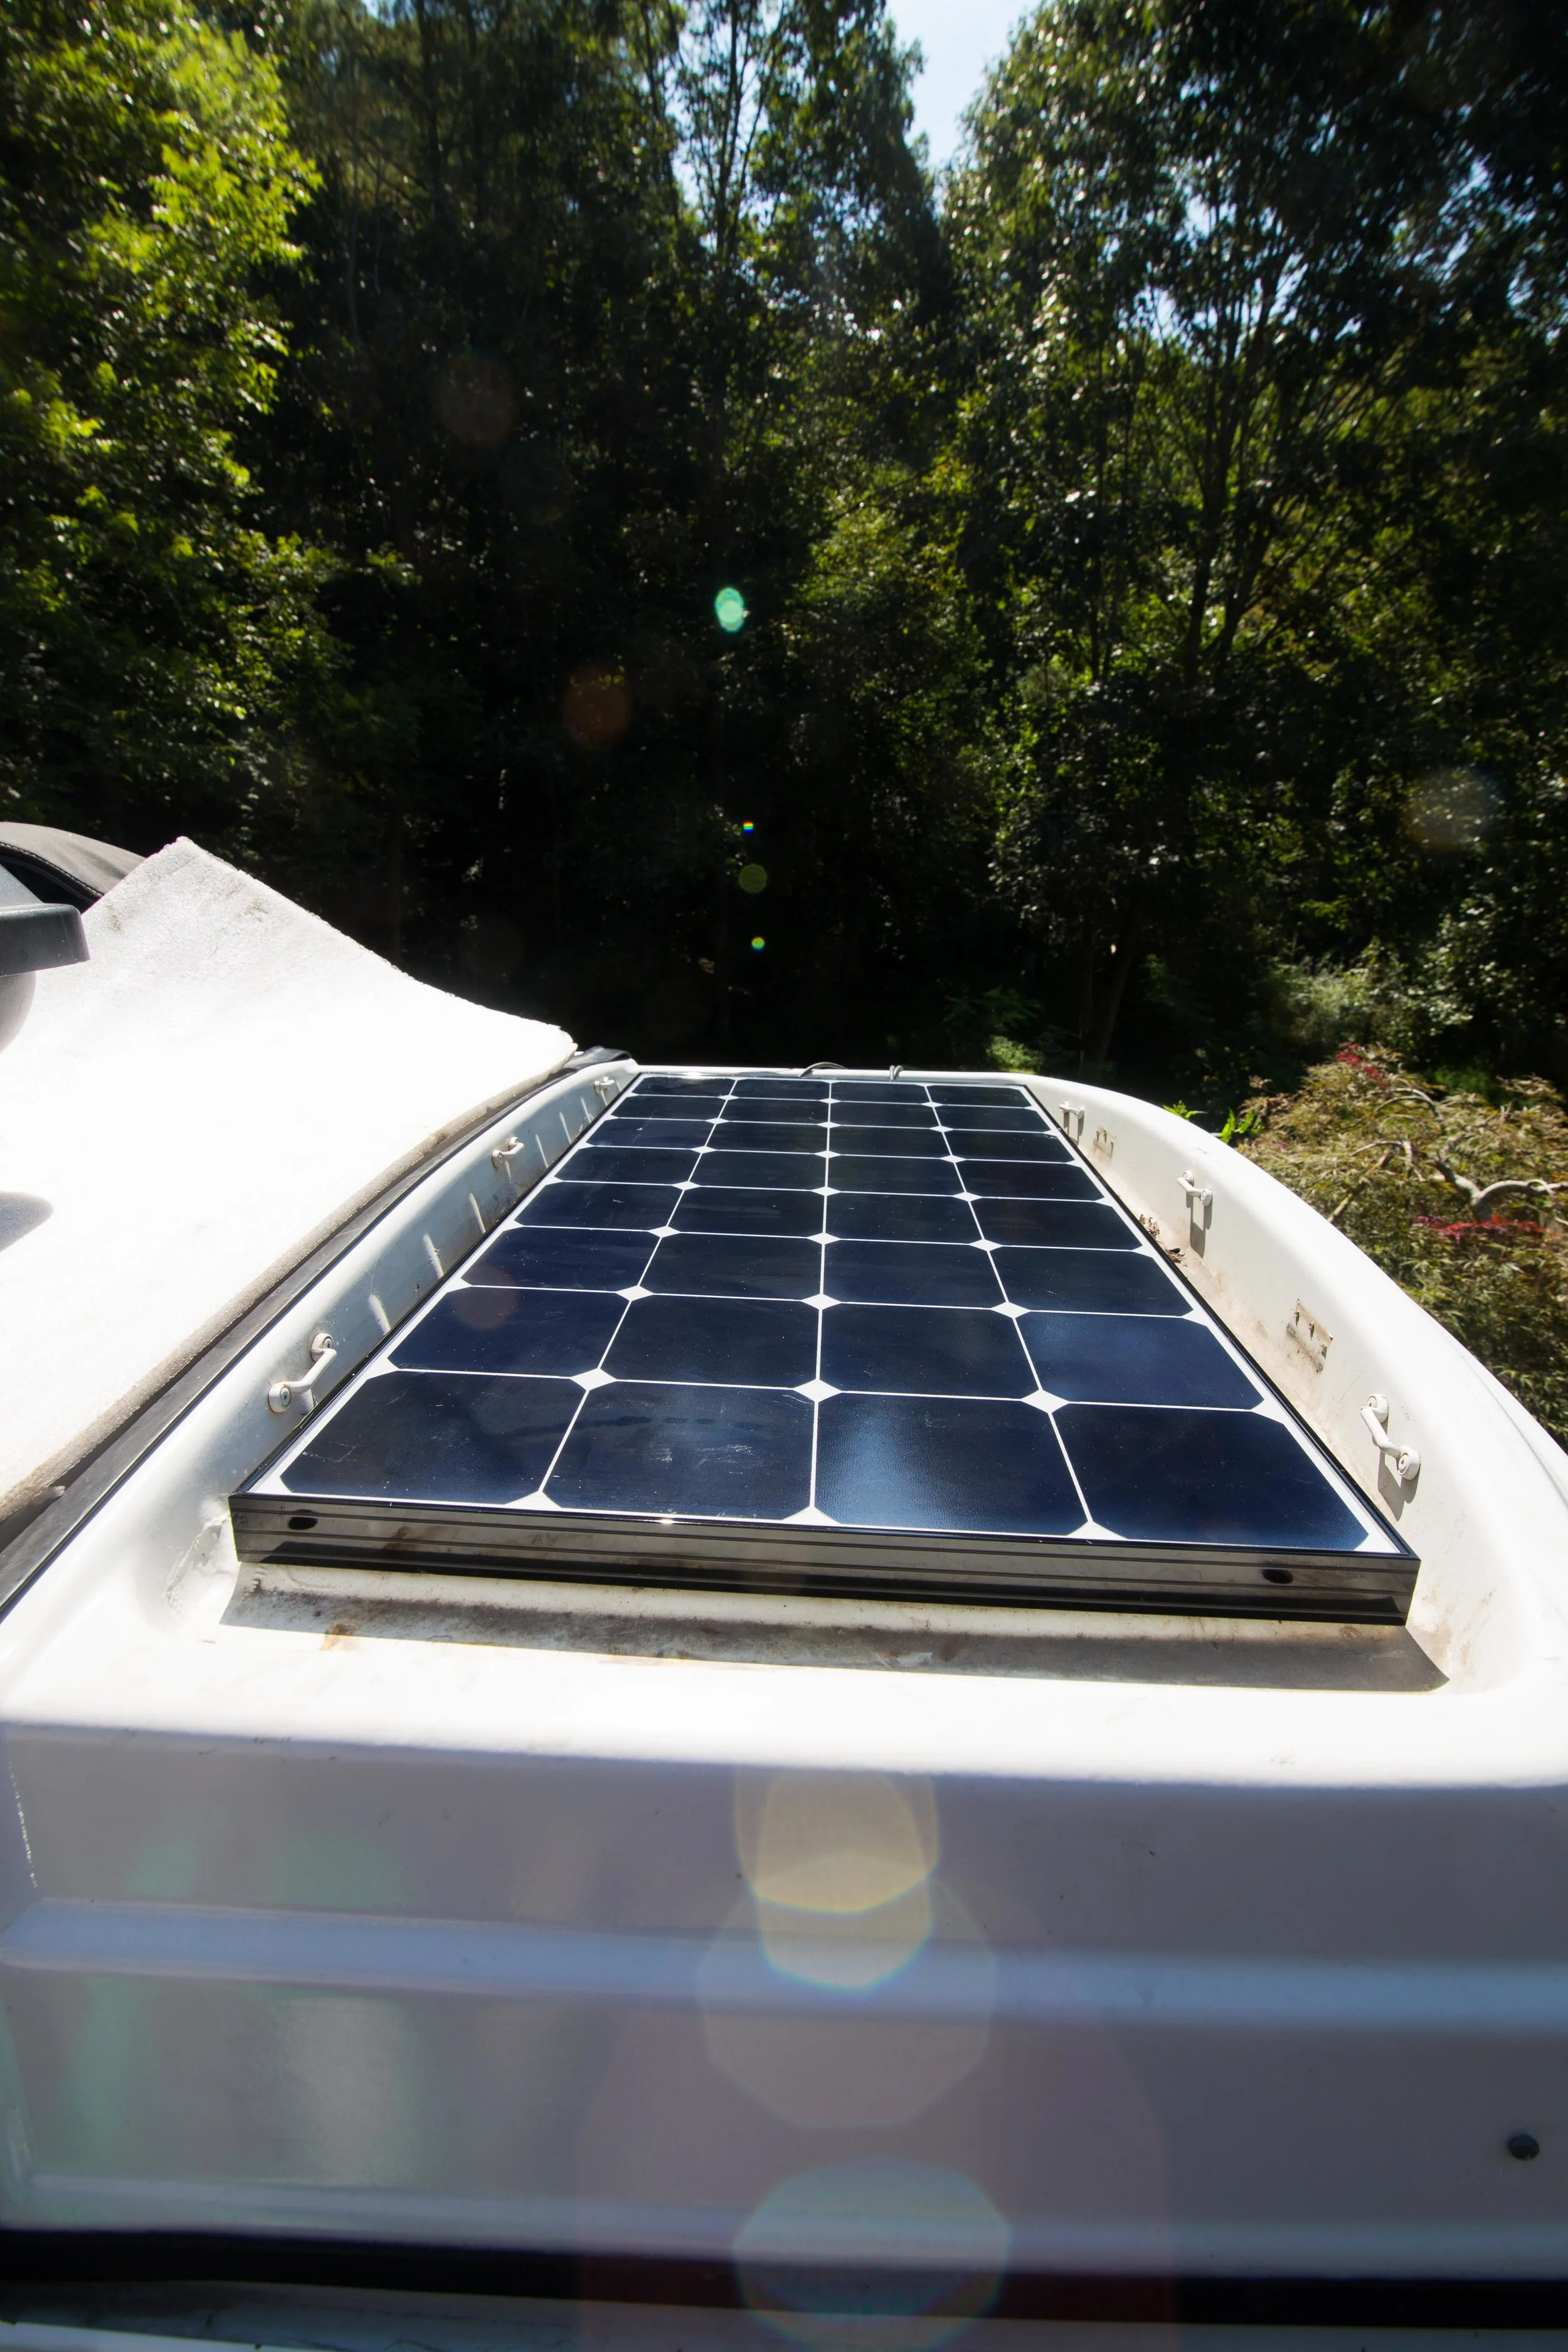
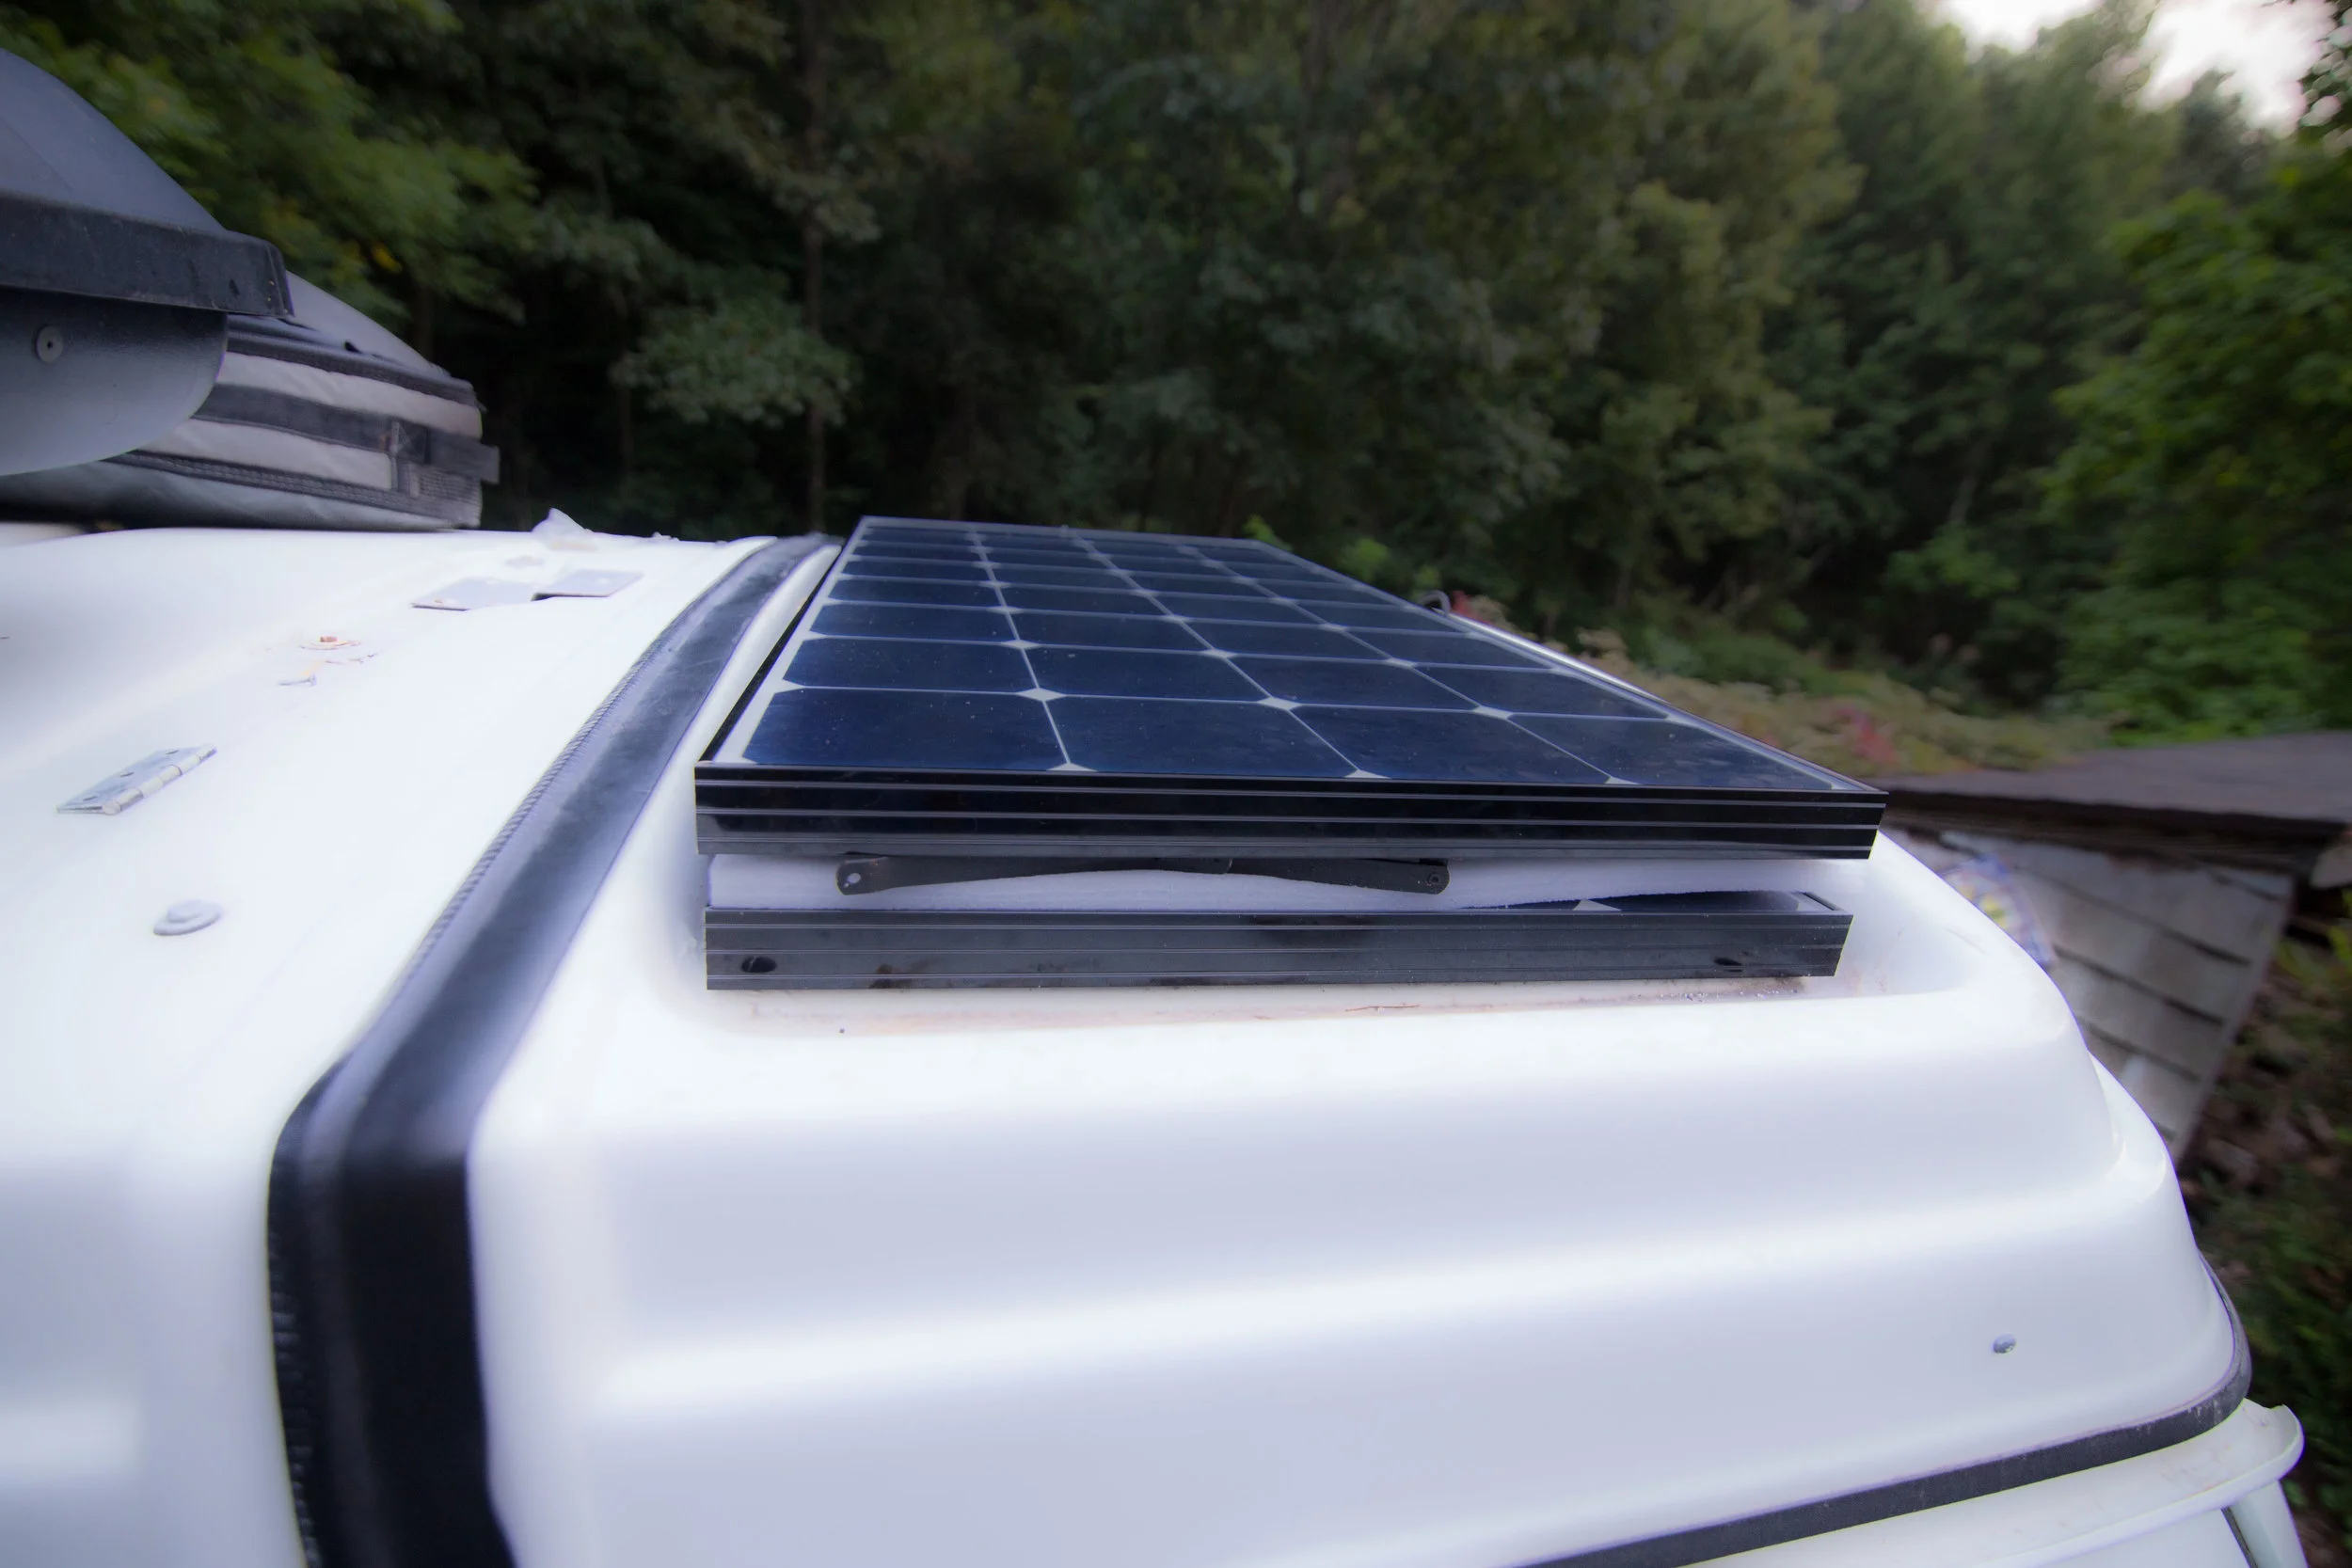
You can see here how one panel fits perfectly inside of the luggage rack. 100 Watts, getting power all the time!
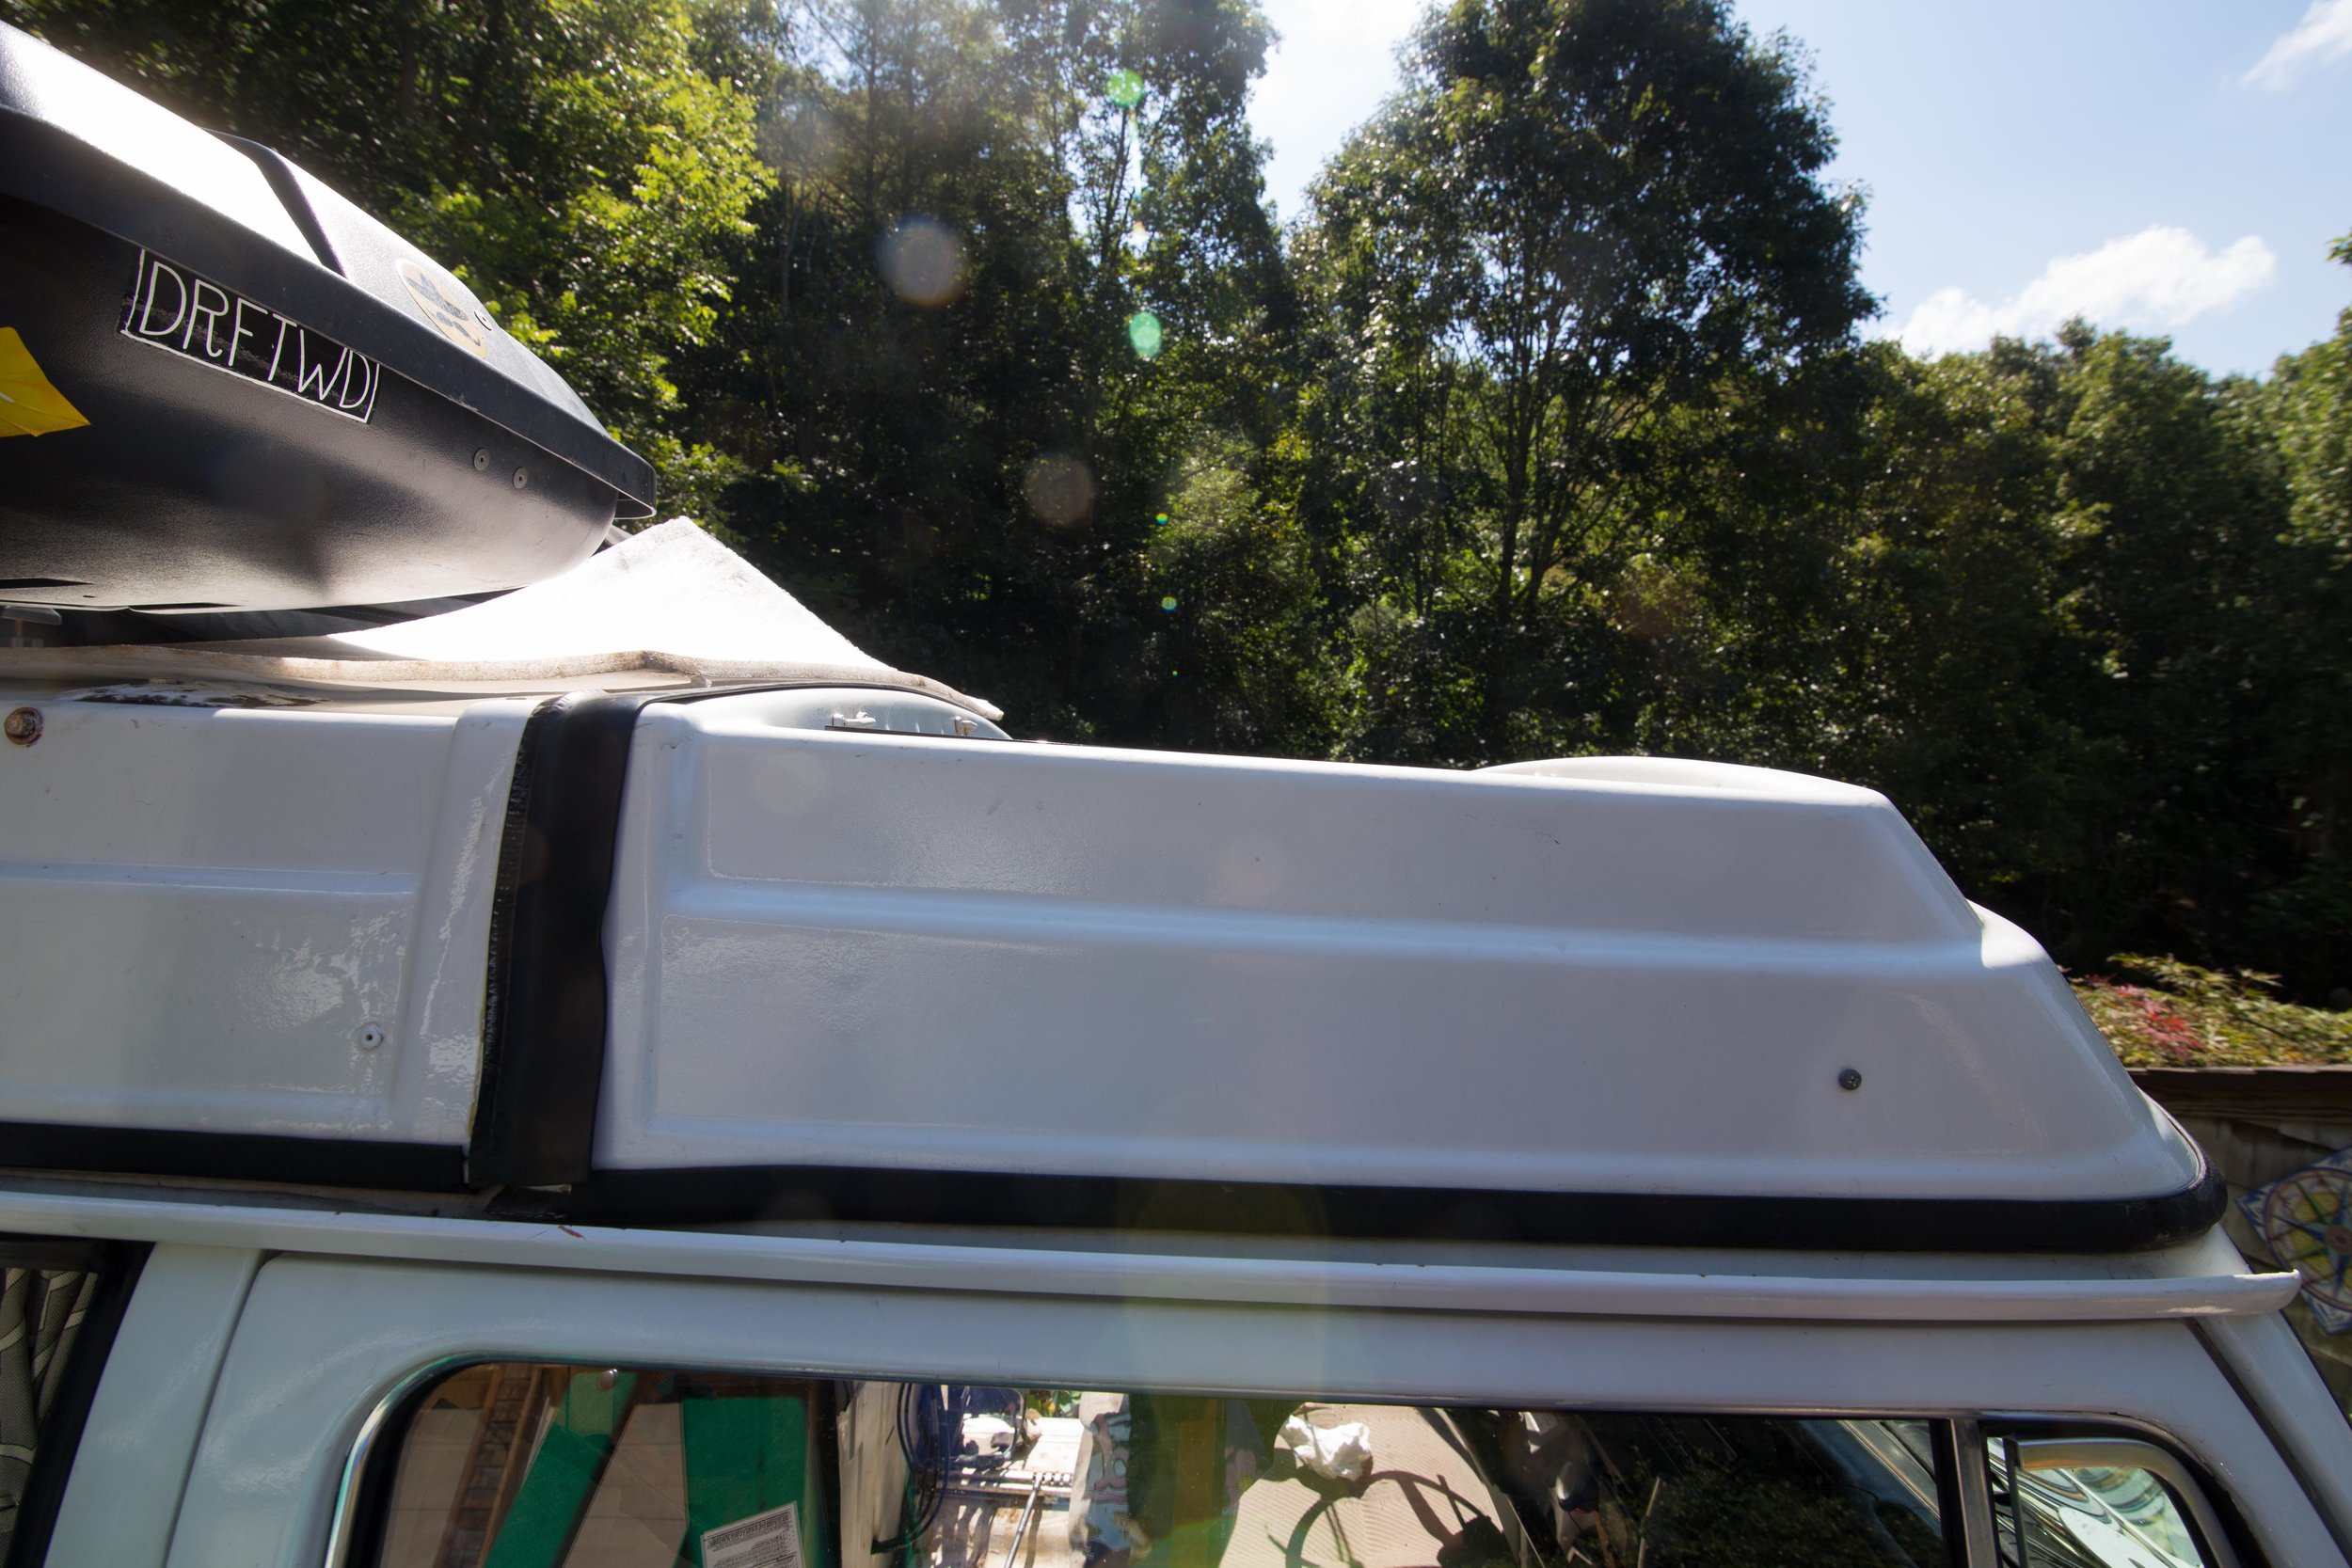
You can't even tell there is a 100 watt panel inside of the luggage rack because it is so thin.
This first panel is going to be the panel which is connected to the 30 ft extension. You aren't actually going to mount this panel at all, it will sit securely under the second panel which will be mounted on the hinge mechanism. You will use the included foam in the solar panel shipping box to create a soft, non damaging barrier between the two panels.
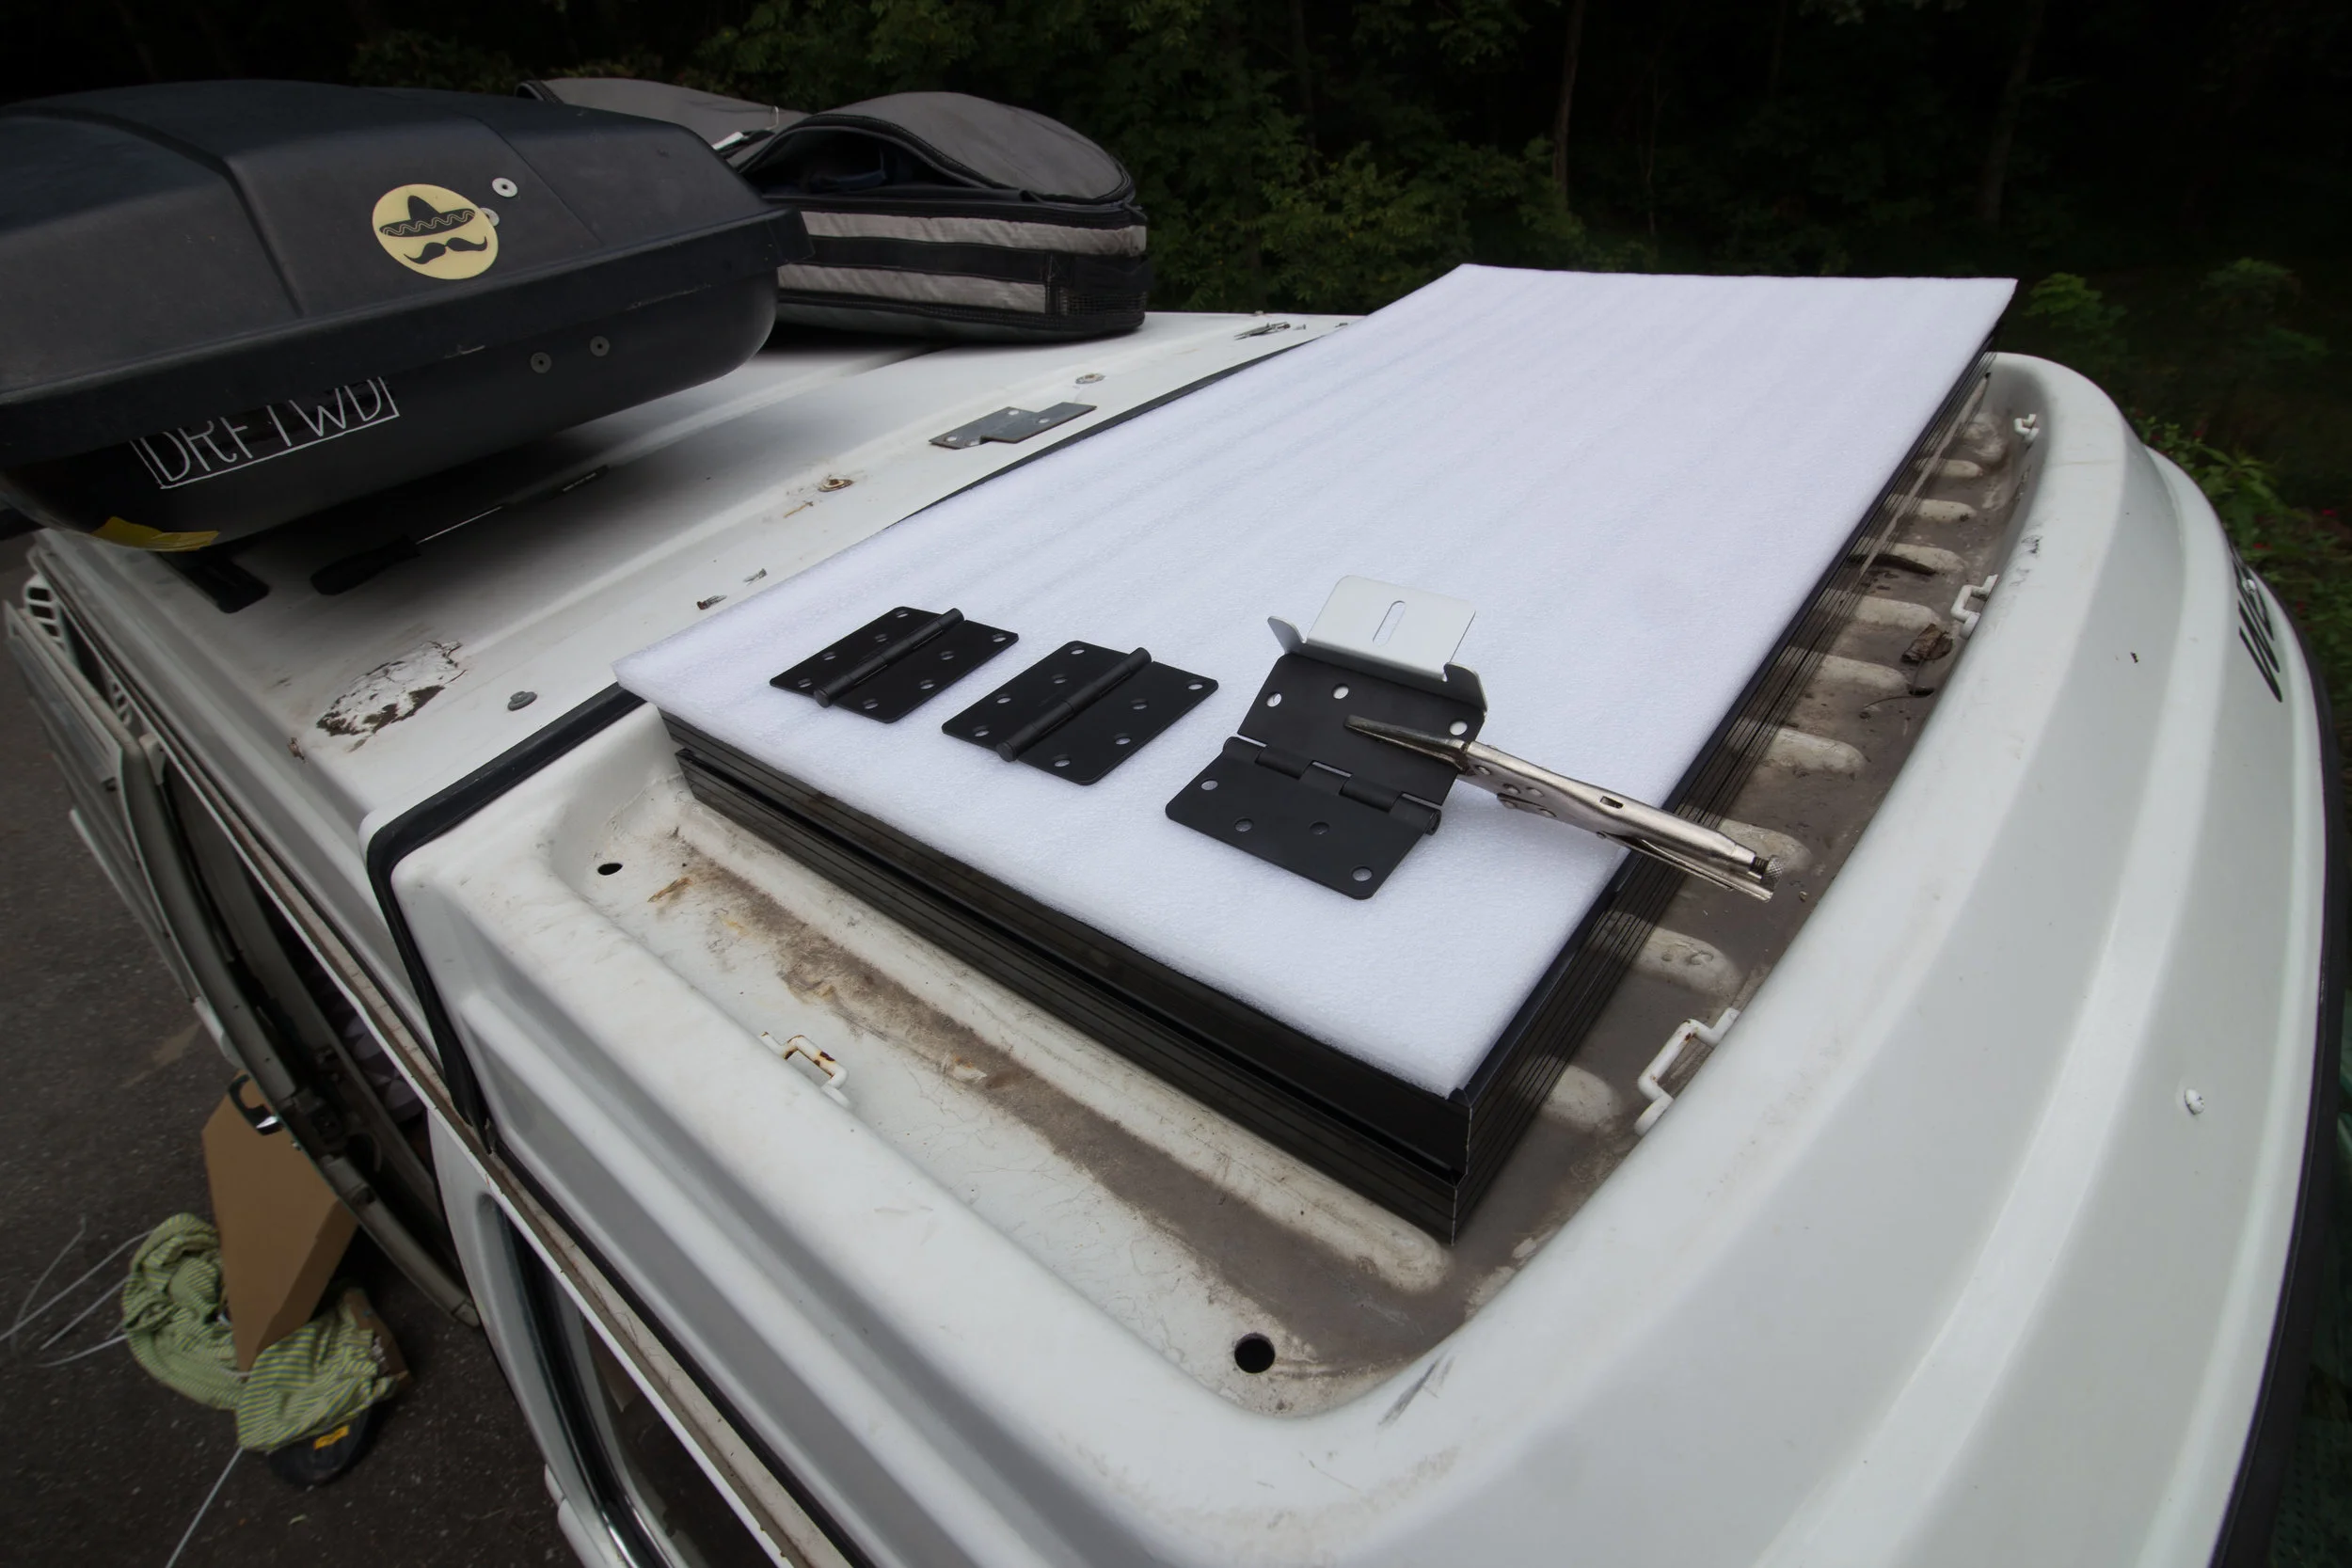
Test fitting the hinges and the panel mounting brackets.
You will need to drill new holes in the brackets to get two securing bolts through the mount and the hinge.
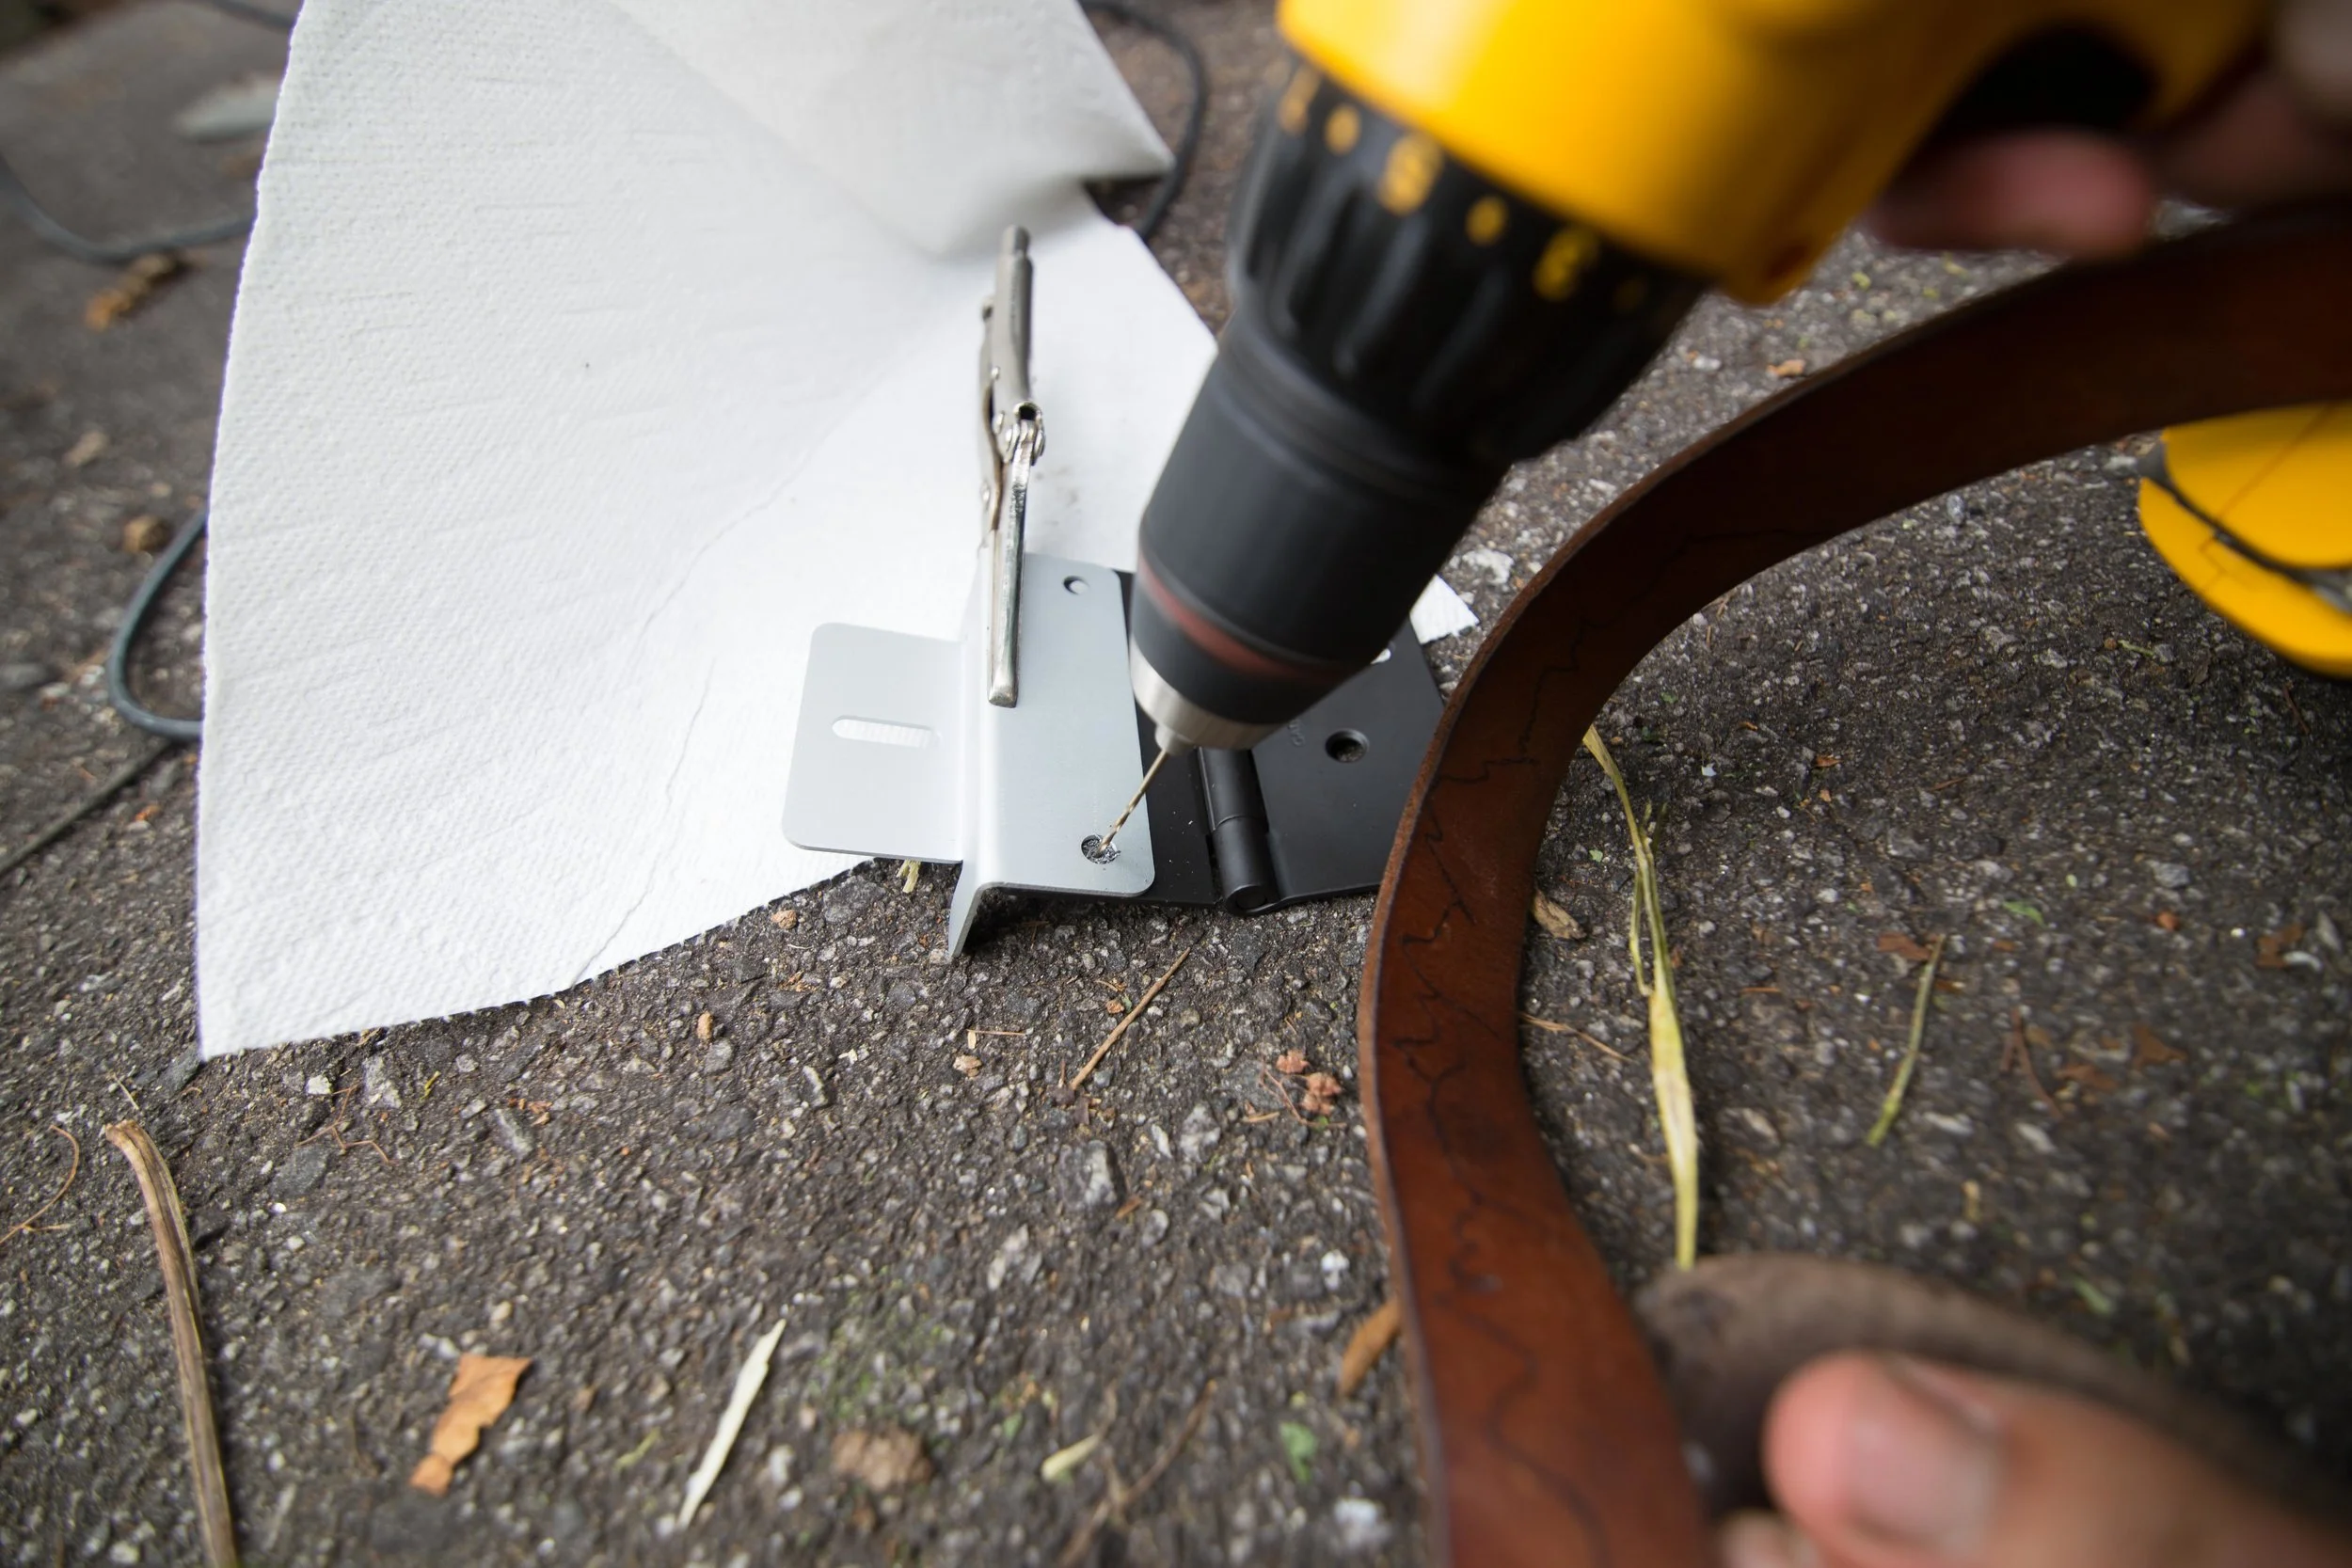
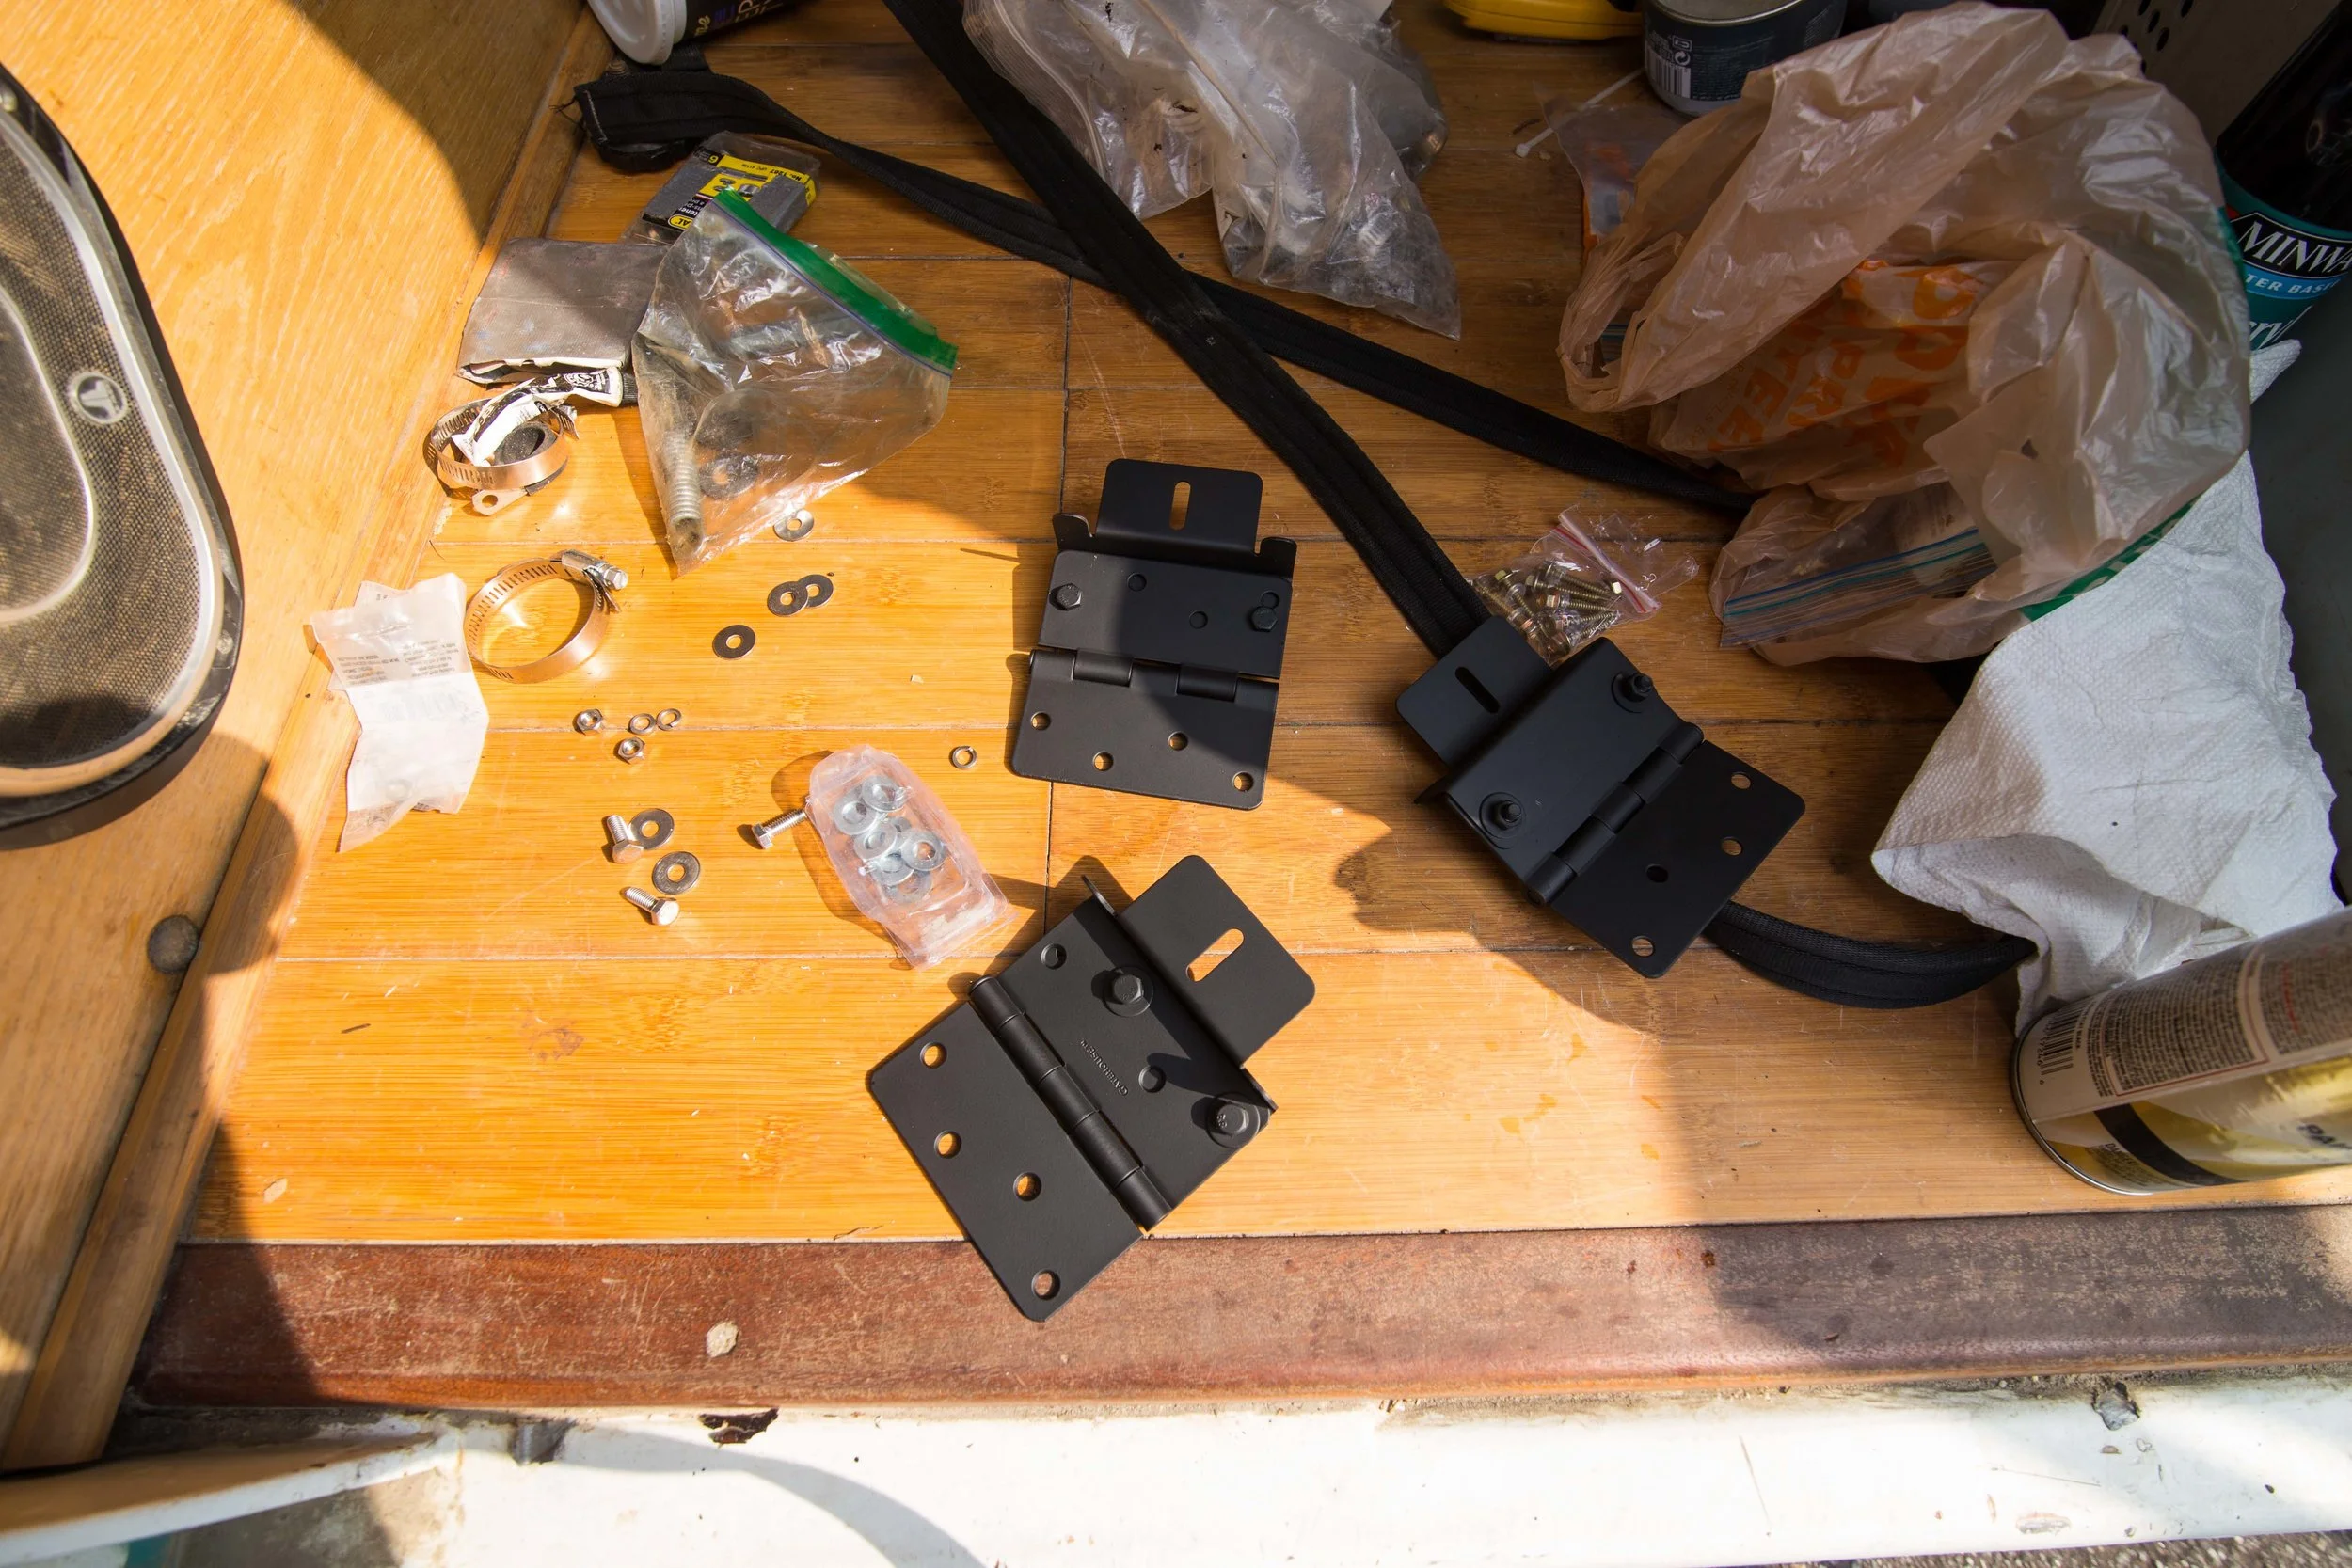
Once you have the holes drilled mount the hardware to join the two. I spray painted everything black for a cleaner look that matches the black edges of the solar panels. The mounting brackets come in a silver finish, and the hinges come in an assortment of finishes.
Now, you want to mount the second panel. Use the included hardware to mount the mounting brackets to the panel. I kept the mounts a little loose as the brackets will have to sit at different lengths from the panel because of the curvature of the luggage rack.
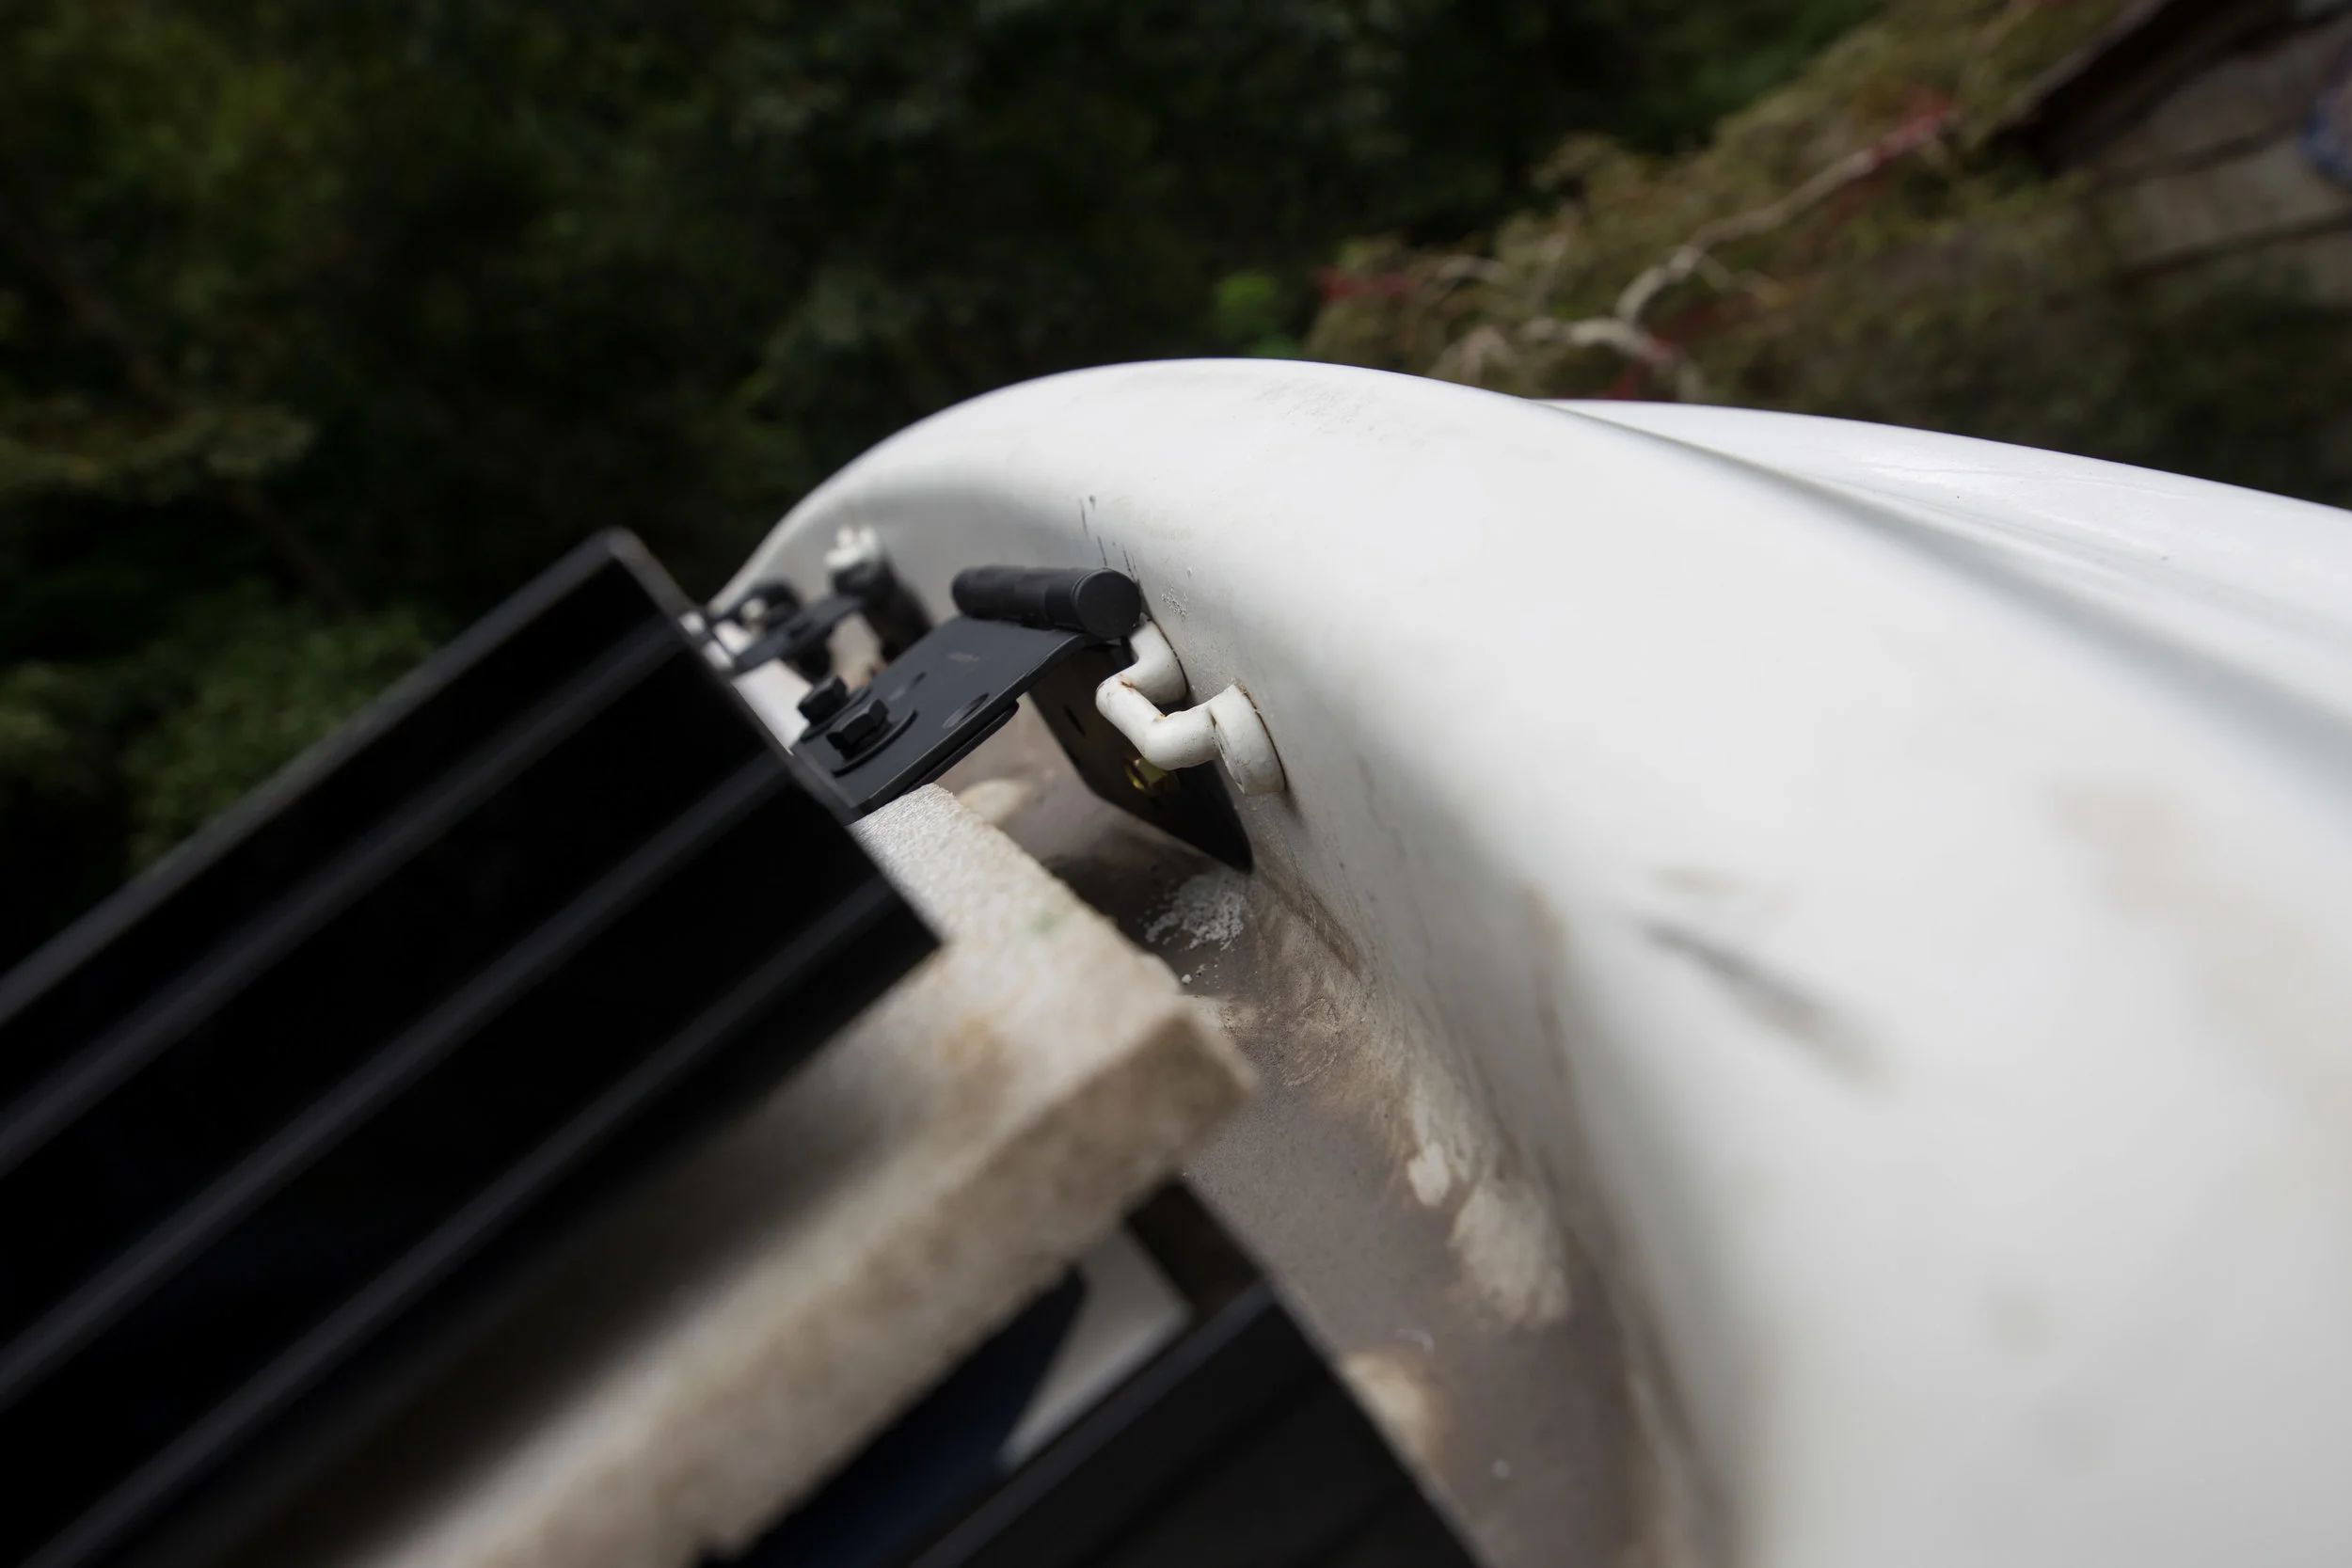
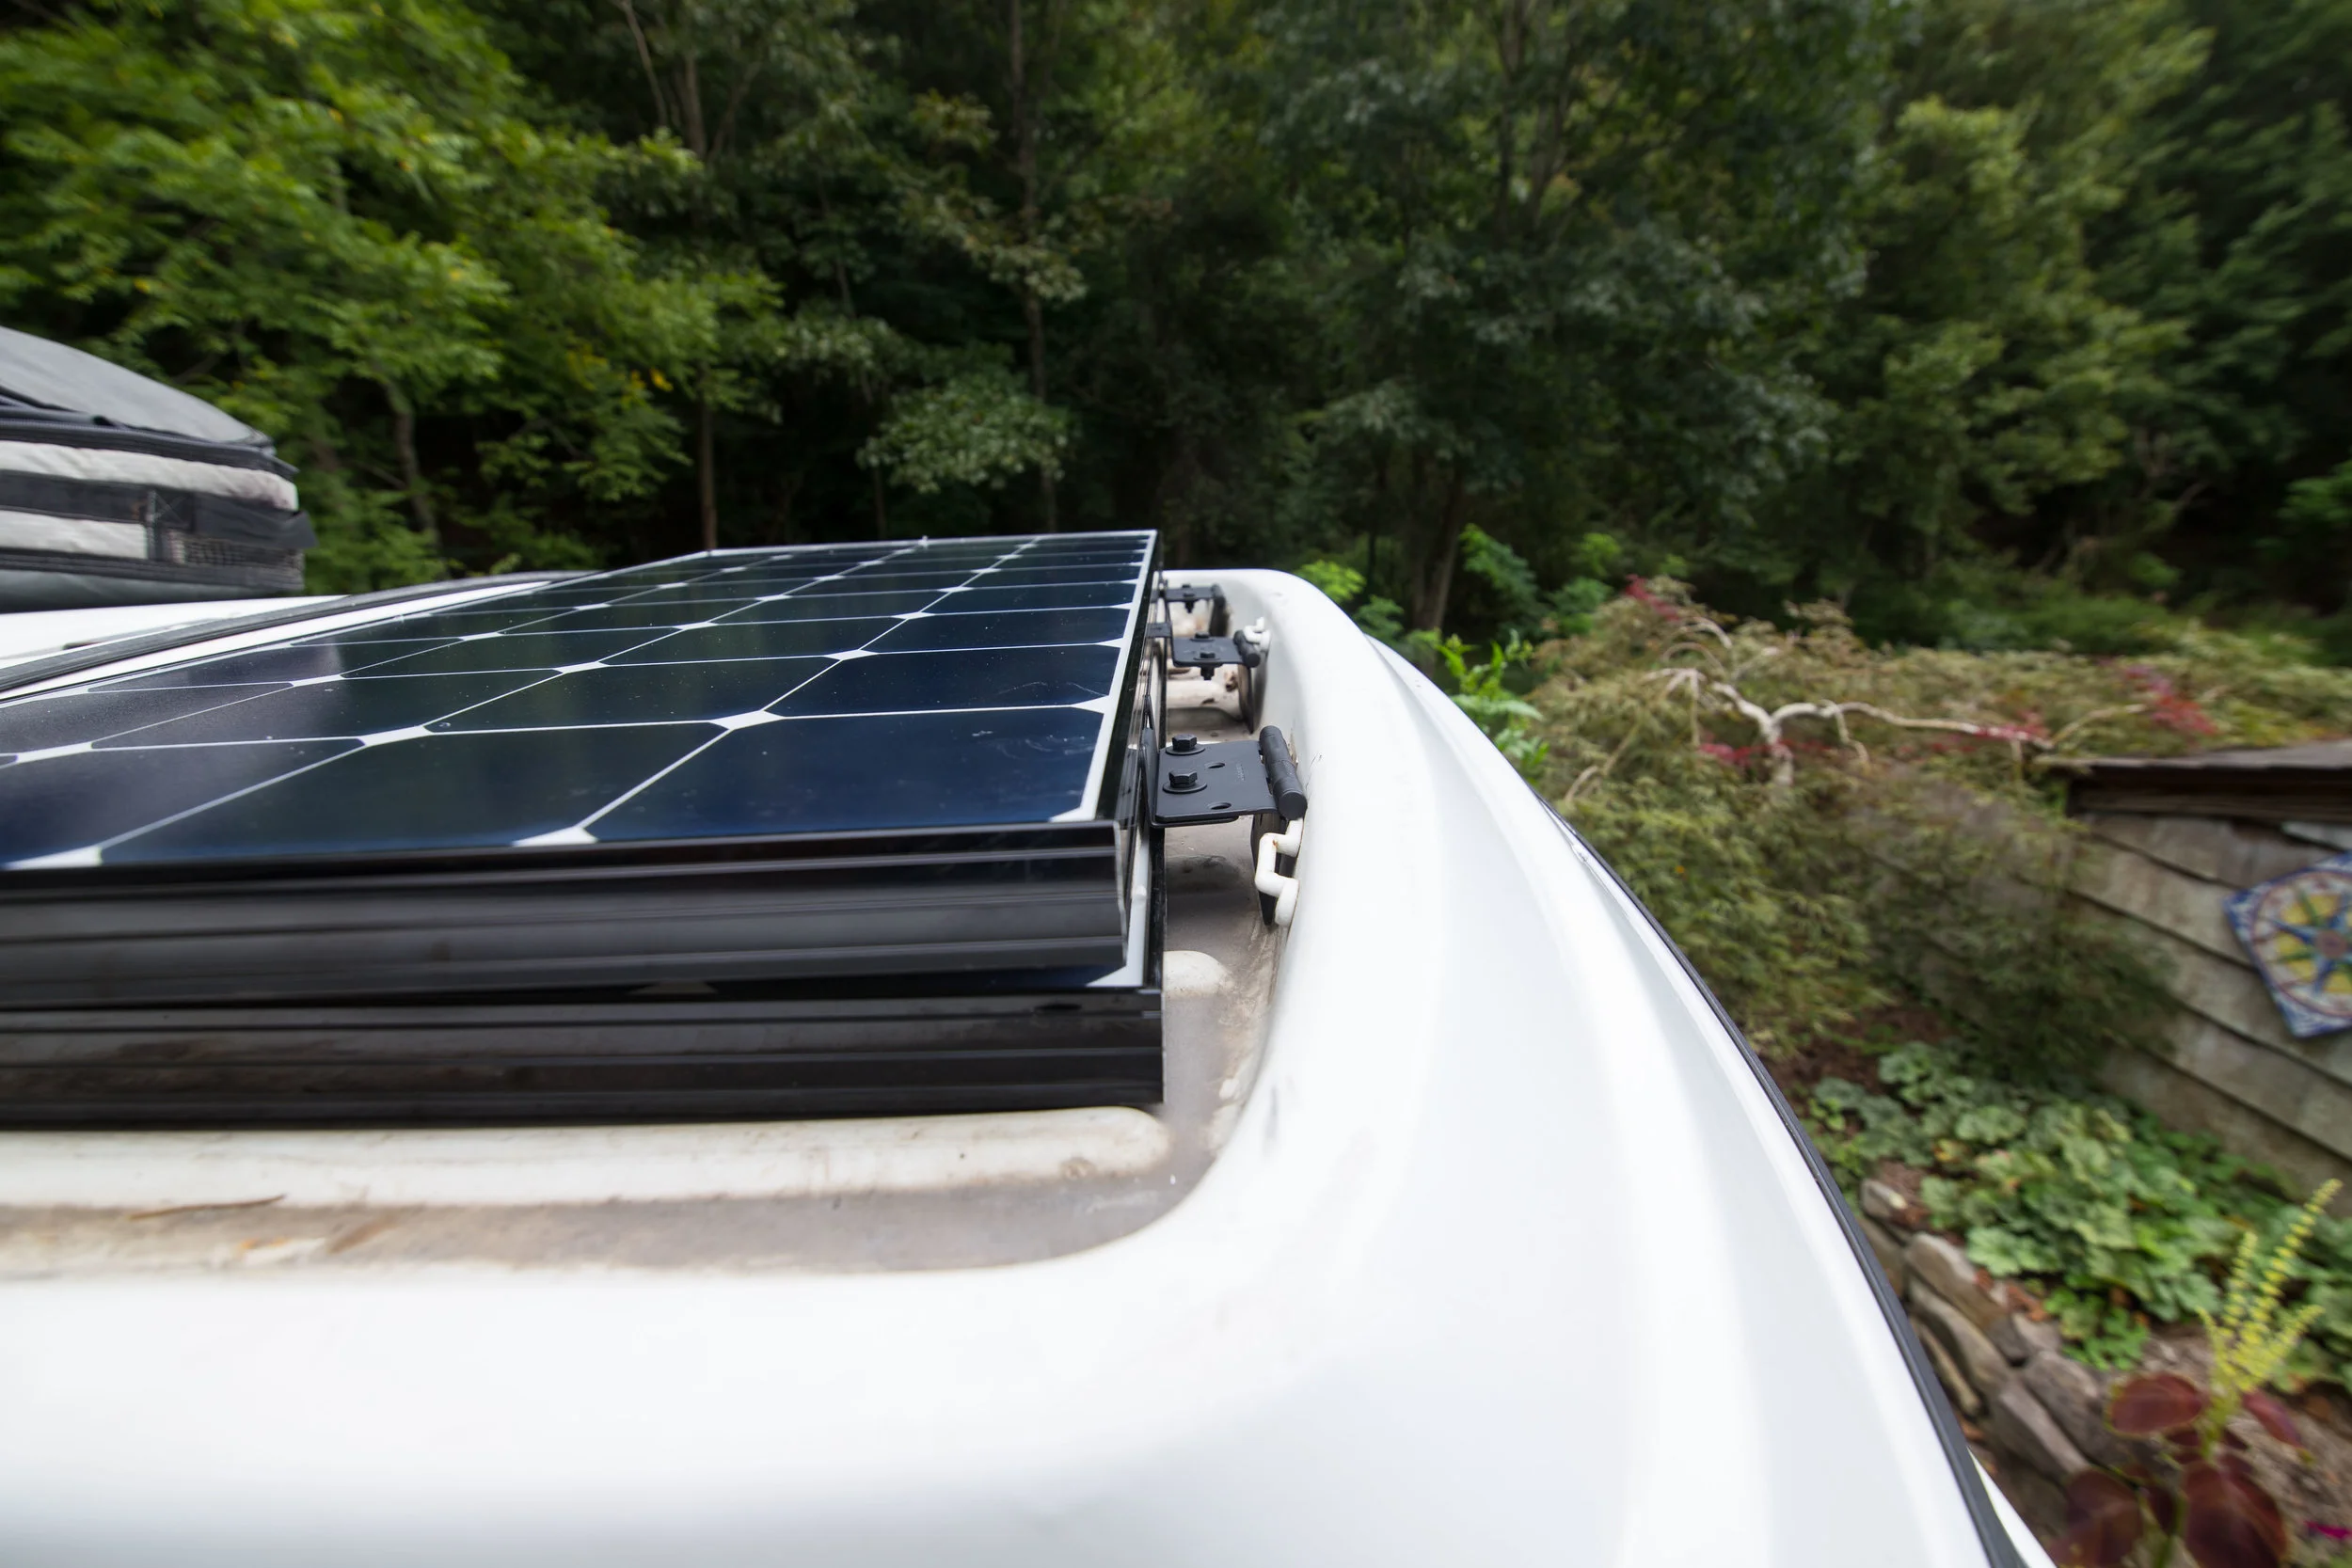
I put one of the bronze (included in the kit) self tapping bolts in each of the hinge brackets and drilled it directly into the luggage rack. The hinges will not all sit completely flush, and you can sort of use the luggage rack tie downs to help support the hinges as well.
Once you have one of self tapping bolts in each hinge you can start tapping more in. With four bolts in each of the hinges the mounting / hinge mechanism will be very secure. Once it is you can hold it up and mount the lid supports.
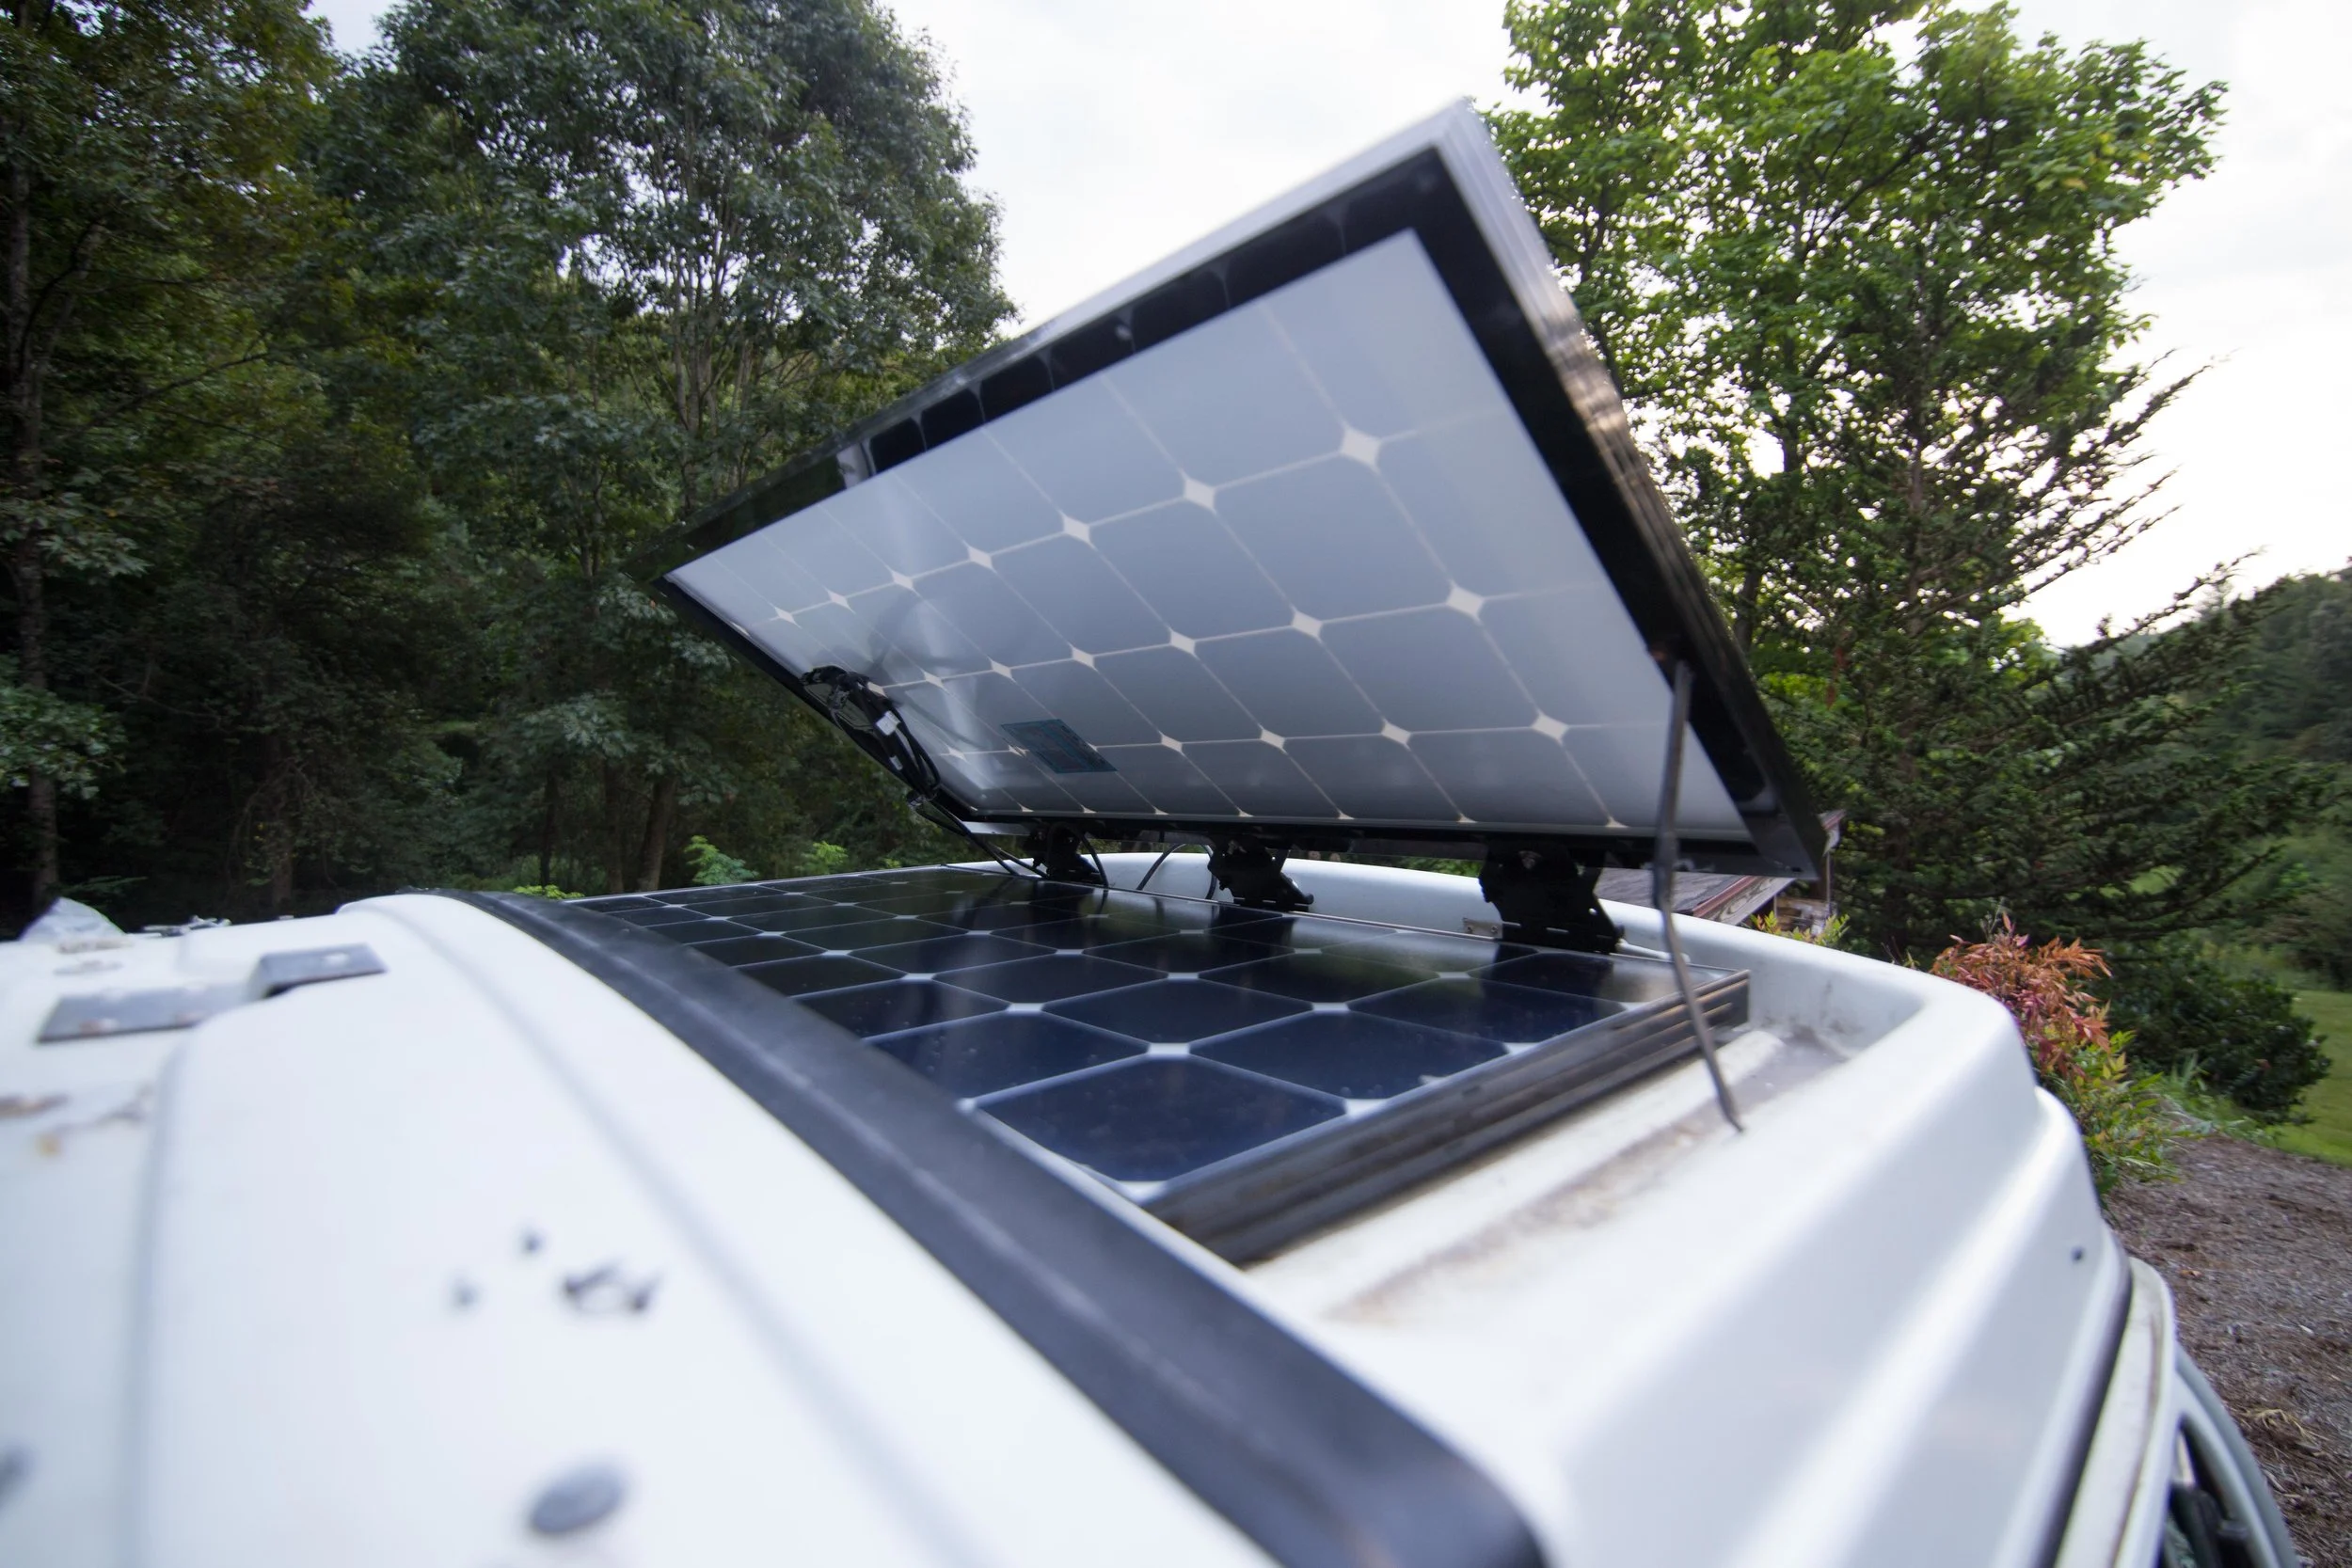
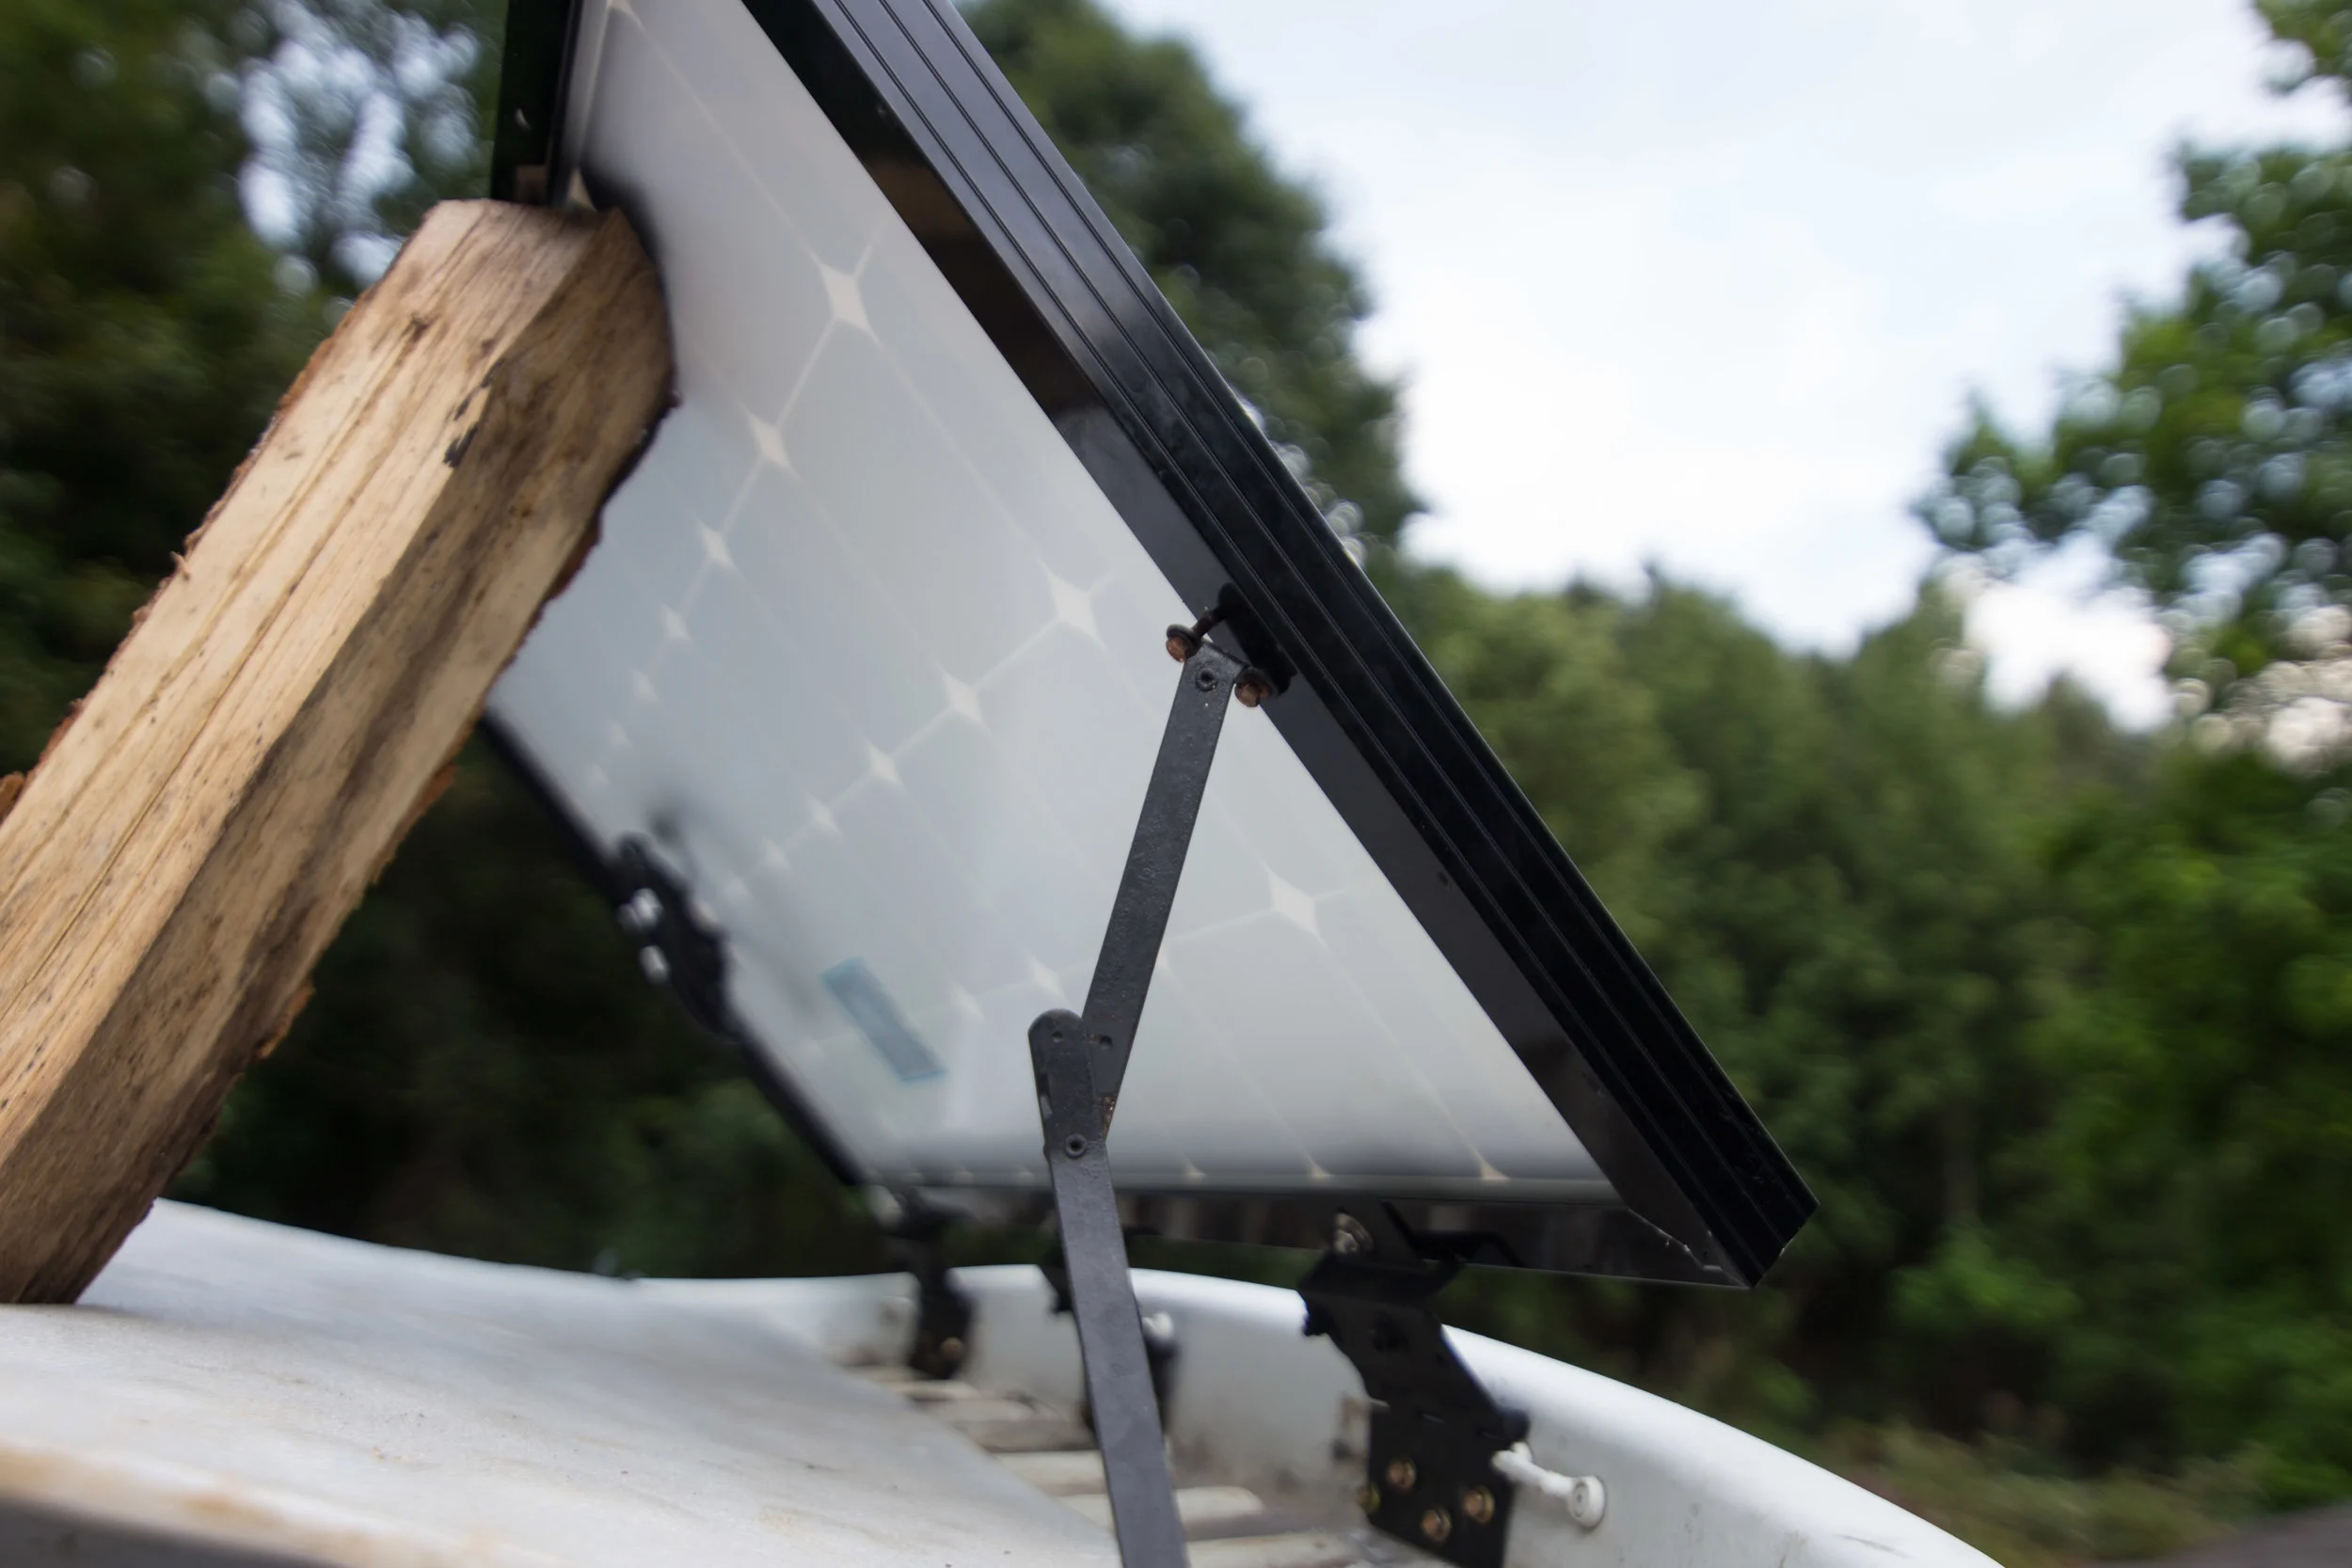
I drilled two holes in the side of the panel once test fitting the lid support and the angel it would create. I mounted it, and then bent the lid support outward so it sits securely in one of the luggage rack tie downs. With this mounting system the panel is still secure when hinged upward.
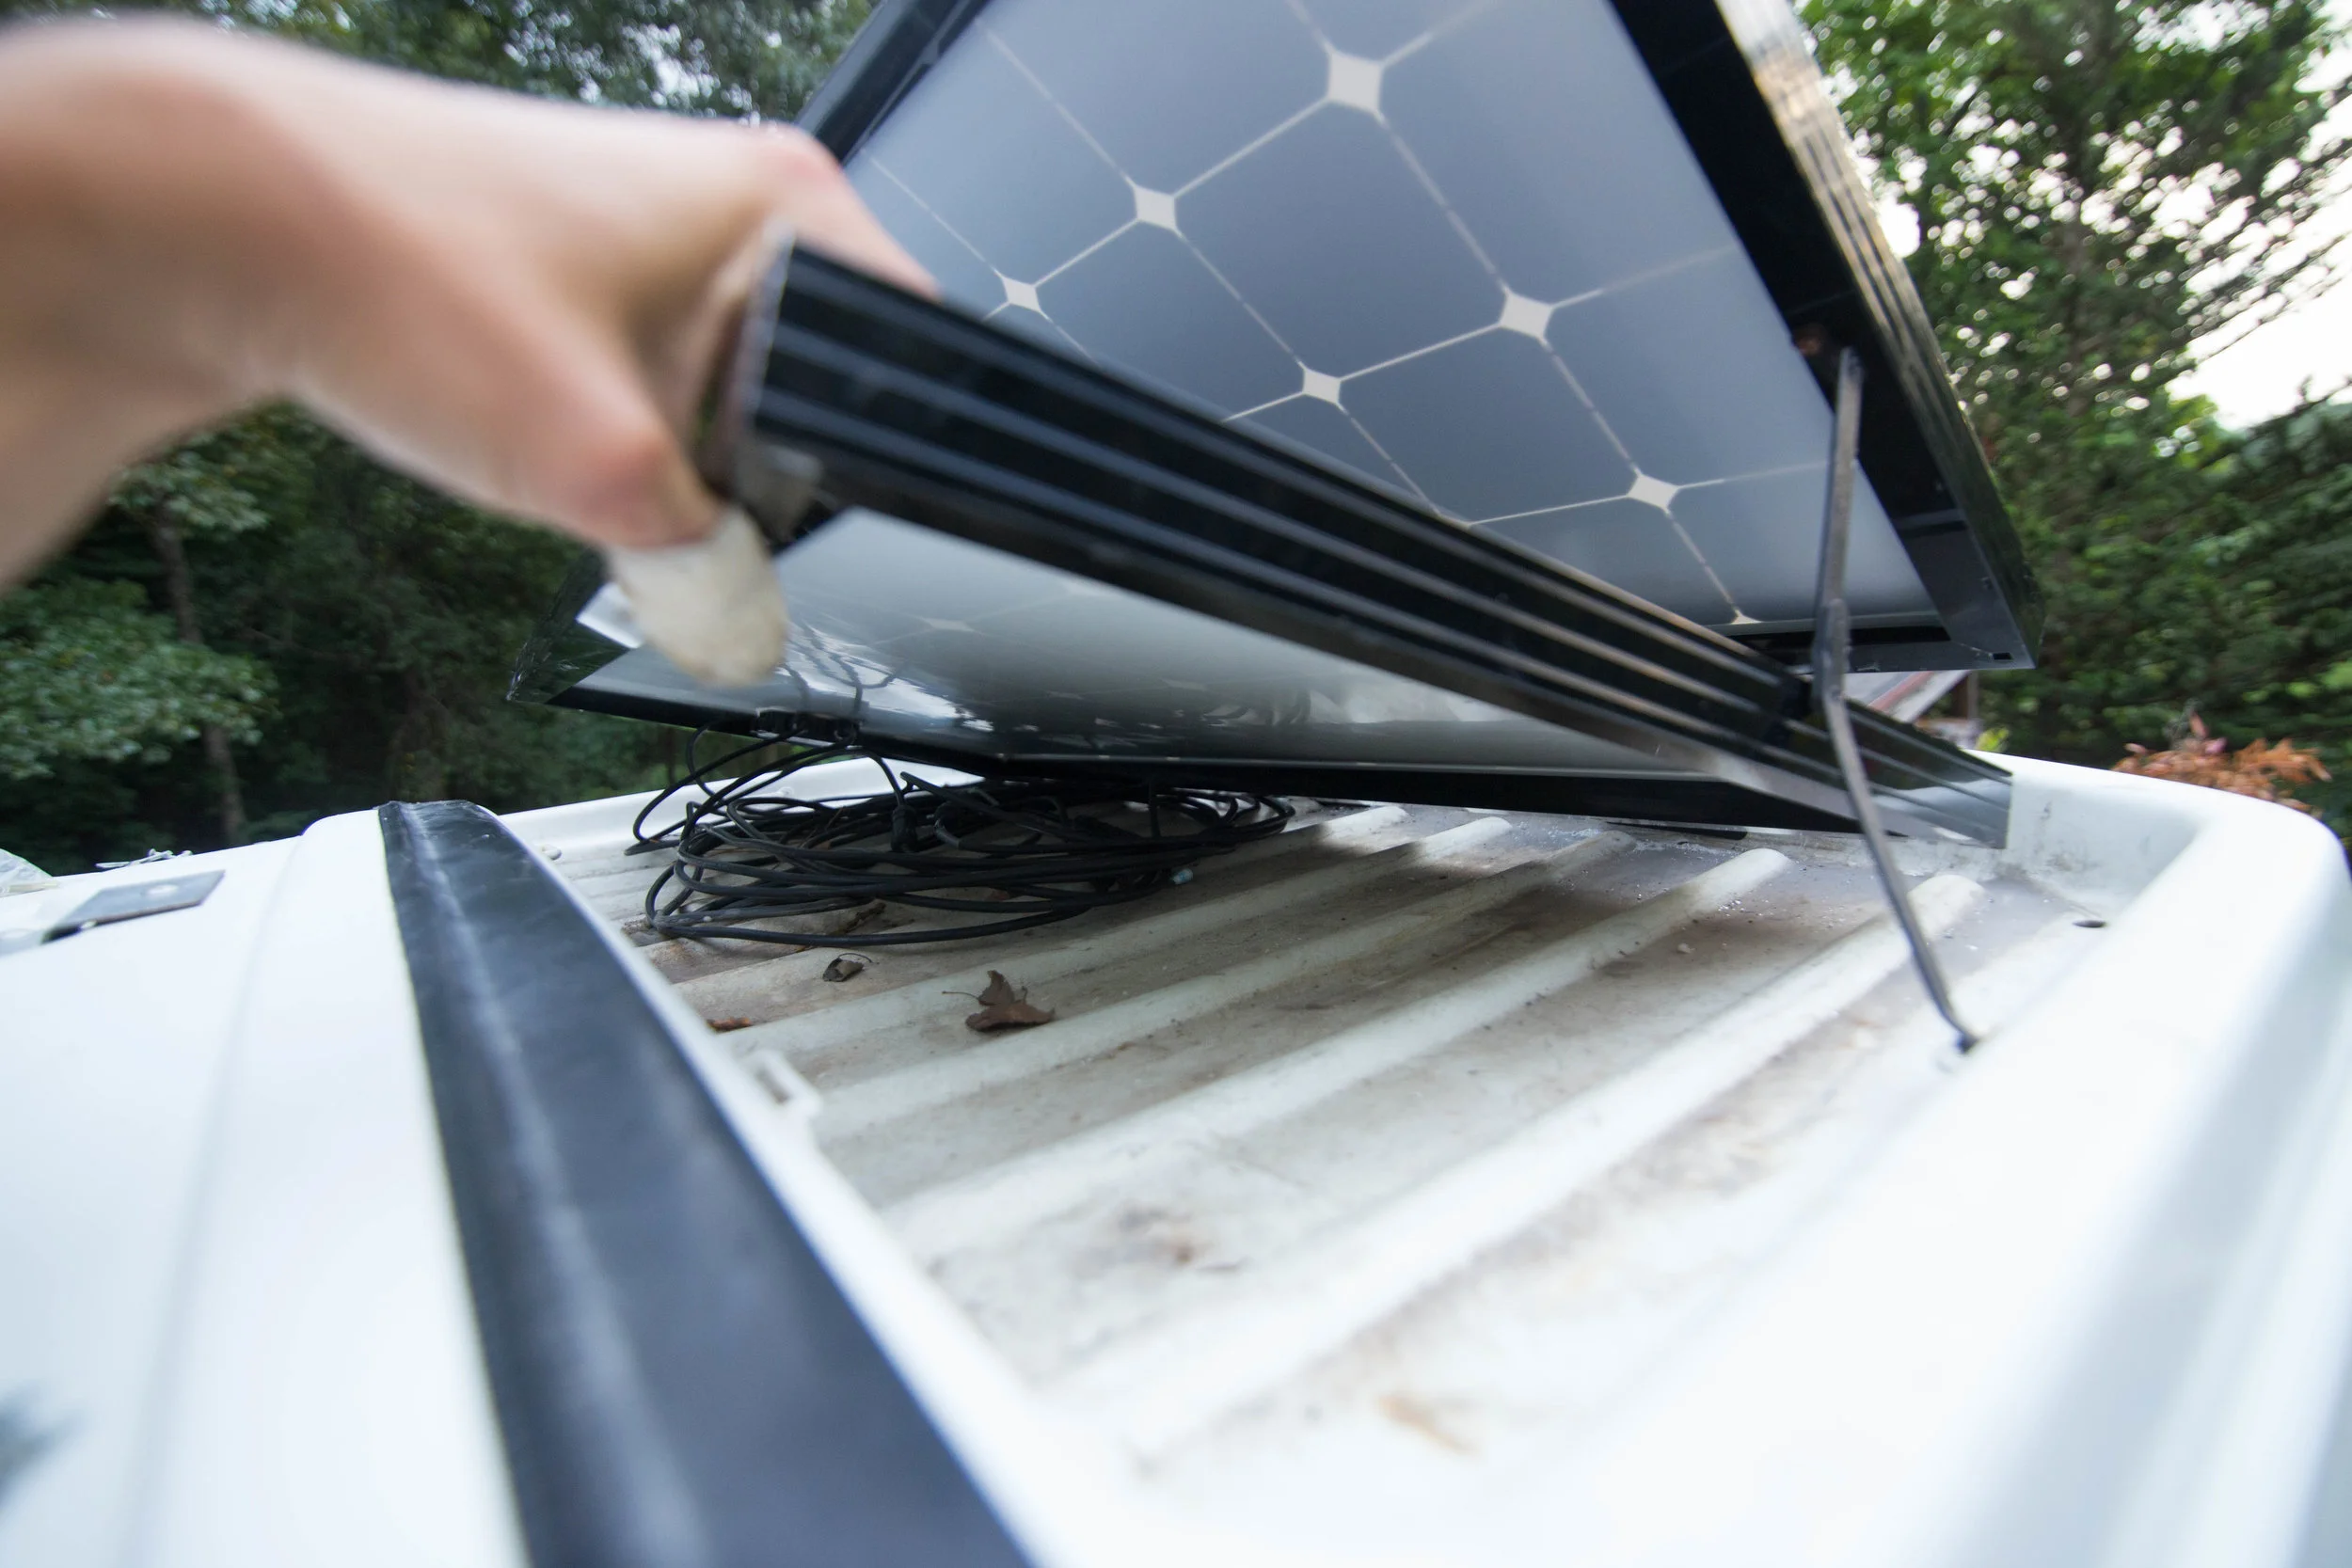
With the top panel hinged up you can easily remove the bottom panel which has the 30 FT wire extension spooled underneath.
In its sitting position it sits two inches up out of the luggage rack, partially visible.
Walla! 200 Watts of energy producing panels on the roof, fairly hidden and secure!
Thanks for checking out our install. Please help us out by ordering from THIS LINK if you order the panels from Renogy. They even have free shipping!